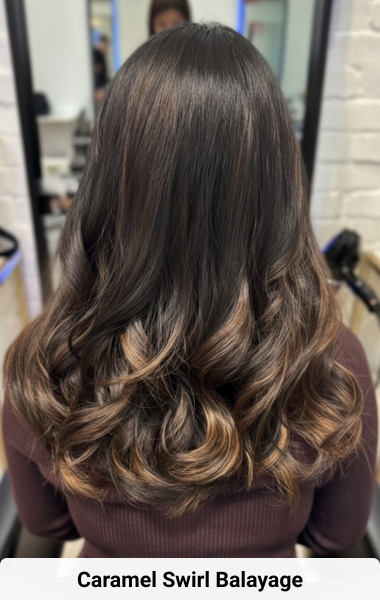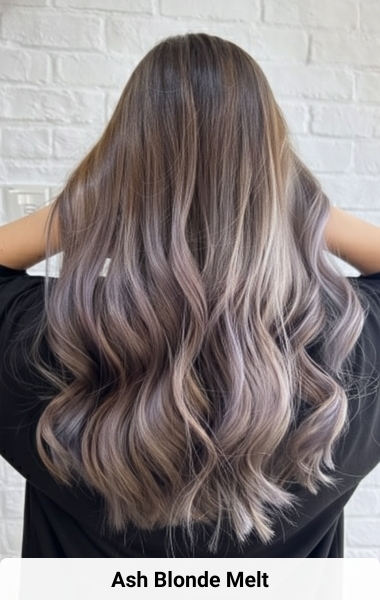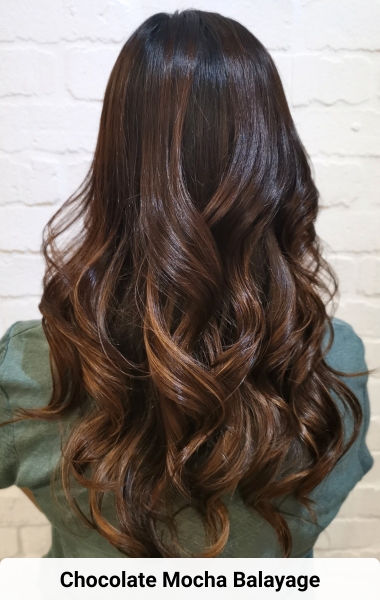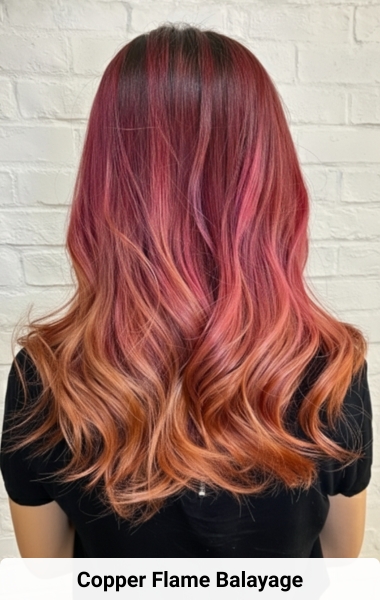
De Arte Hair Studio

Mastering Modern Hair Color: Balayage Ombré, Creative, and Classic Highlights Explained

Mastering Modern Hair Color: Balayage Ombré, Creative, and Classic Highlights Explained

Highlights and modern hair color aren’t just about changing your hair, they completely transform your style, confidence, and personal vibe. The right highlights enhance natural beauty, add depth, and create a luminous, multidimensional finish. Whether you want a soft sun-kissed glow, bold editorial tones, or a polished classic look, understanding these hair color techniques will help you get the results you’ve always dreamed of.

In this ultimate guide, you’ll discover three essential techniques: Balayage Ombré, Creative Highlights, and Classic Highlights. With detailed step-by-step instructions, styling tips, maintenance advice, and professional insights. By the end, you should have an idea on which style suits your hair type, lifestyle, and personality best.

Because the right highlights don’t just change your hair, they change your whole vibe.

1. Introduction to Modern Hair Techniques

Modern hair techniques aren’t just about lightening strands; they’re a form of artistic expression. With carefully placed sections of color, hair gains visual volume, shine, and multidimensional movement.

The key benefits include:

* Enhancing natural texture and body
* Accentuating facial features
* Providing flexible styling options
* Offering results that grow out gracefully

Every technique can be tailored to hair type, texture, and lifestyle, ensuring a polished, high-end finish without compromising hair health.
2. How Colors Transform Your Look
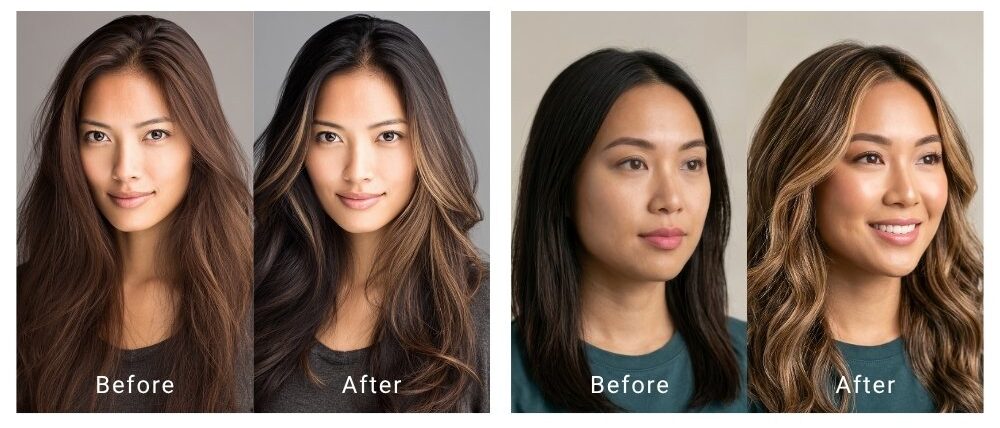
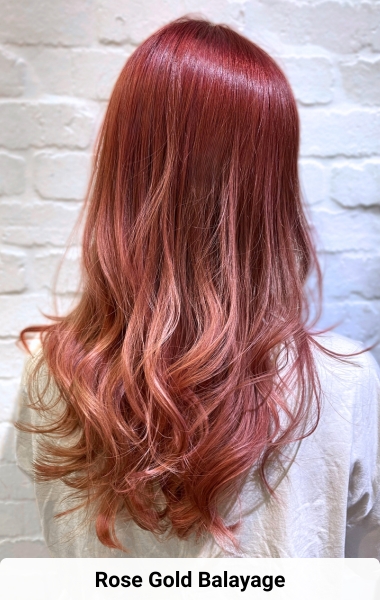
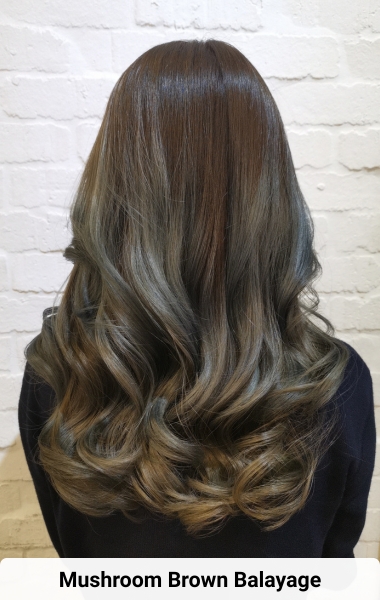
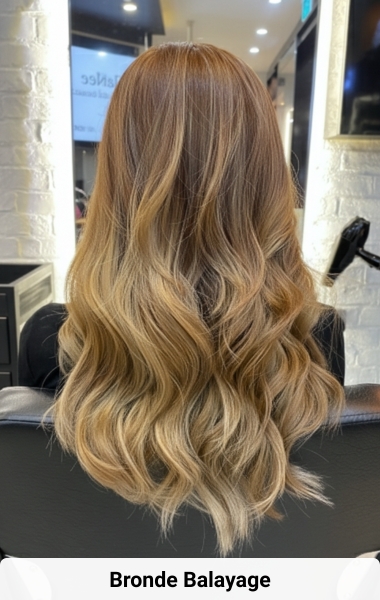
Modern Hair Coloring Before and After 1
Images are generated for reference purposes only.
Whether you’re looking for a subtle refresh or a noticeable transformation, the choice is yours. Each technique offers something unique:

* Depth and dimension: Creates the illusion of thicker, fuller hair
* Face-framing effects: Lightens around the face for a radiant glow
* Personal expression: From subtle natural tones to bold fashion colors
* Low-maintenance options: Some techniques allow longer intervals between salon visits

Professional hair coloring can boost confidence and elevate your overall vibe. There’s no right or wrong, just the version of yourself you’d like to express.
3. Understanding Hair Pigments, Lift, and Color Science
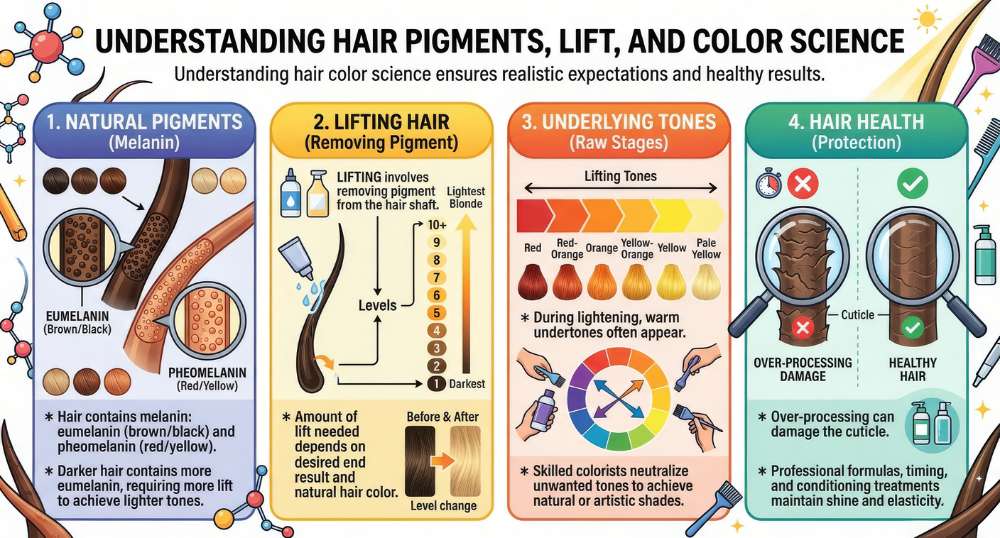
Understanding Hair Pigments, Lift, and Color Science
Before coloring your hair, it helps to understand how hair color actually works. This makes it easier to choose the right highlights and set realistic expectations for results and hair health.
Hair Pigments
Your natural hair color comes from melanin, the pigment inside each strand:
  • Eumelanin gives brown and black tones
  • Pheomelanin gives red and yellow tones
Darker hair contains more eumelanin, which means it usually needs more controlled lightening to achieve lighter shades.
Lifting Hair
“Lift” refers to how much natural pigment is gently removed from the hair during the lightening process.
  • The higher the lift, the lighter the hair becomes
  • The amount of lift needed depends on your starting color and your desired result
  • Controlled lifting is important to avoid unnecessary damage
Underlying Tones
As hair lifts, it naturally reveals warm tones underneath (yellow, orange, or red).
  • This is completely normal and part of the lightening process
  • Toners are then used to refine or neutralize these tones for the final desired shade
Hair Health
Because lightening affects the hair structure, over-processing can lead to dryness or breakage. Professional colorists manage this by:
  • Customizing the lightening process based on your hair condition
  • Carefully monitoring processing time
  • Using conditioning and bond-support treatments
How Hair Structure Plays a Role
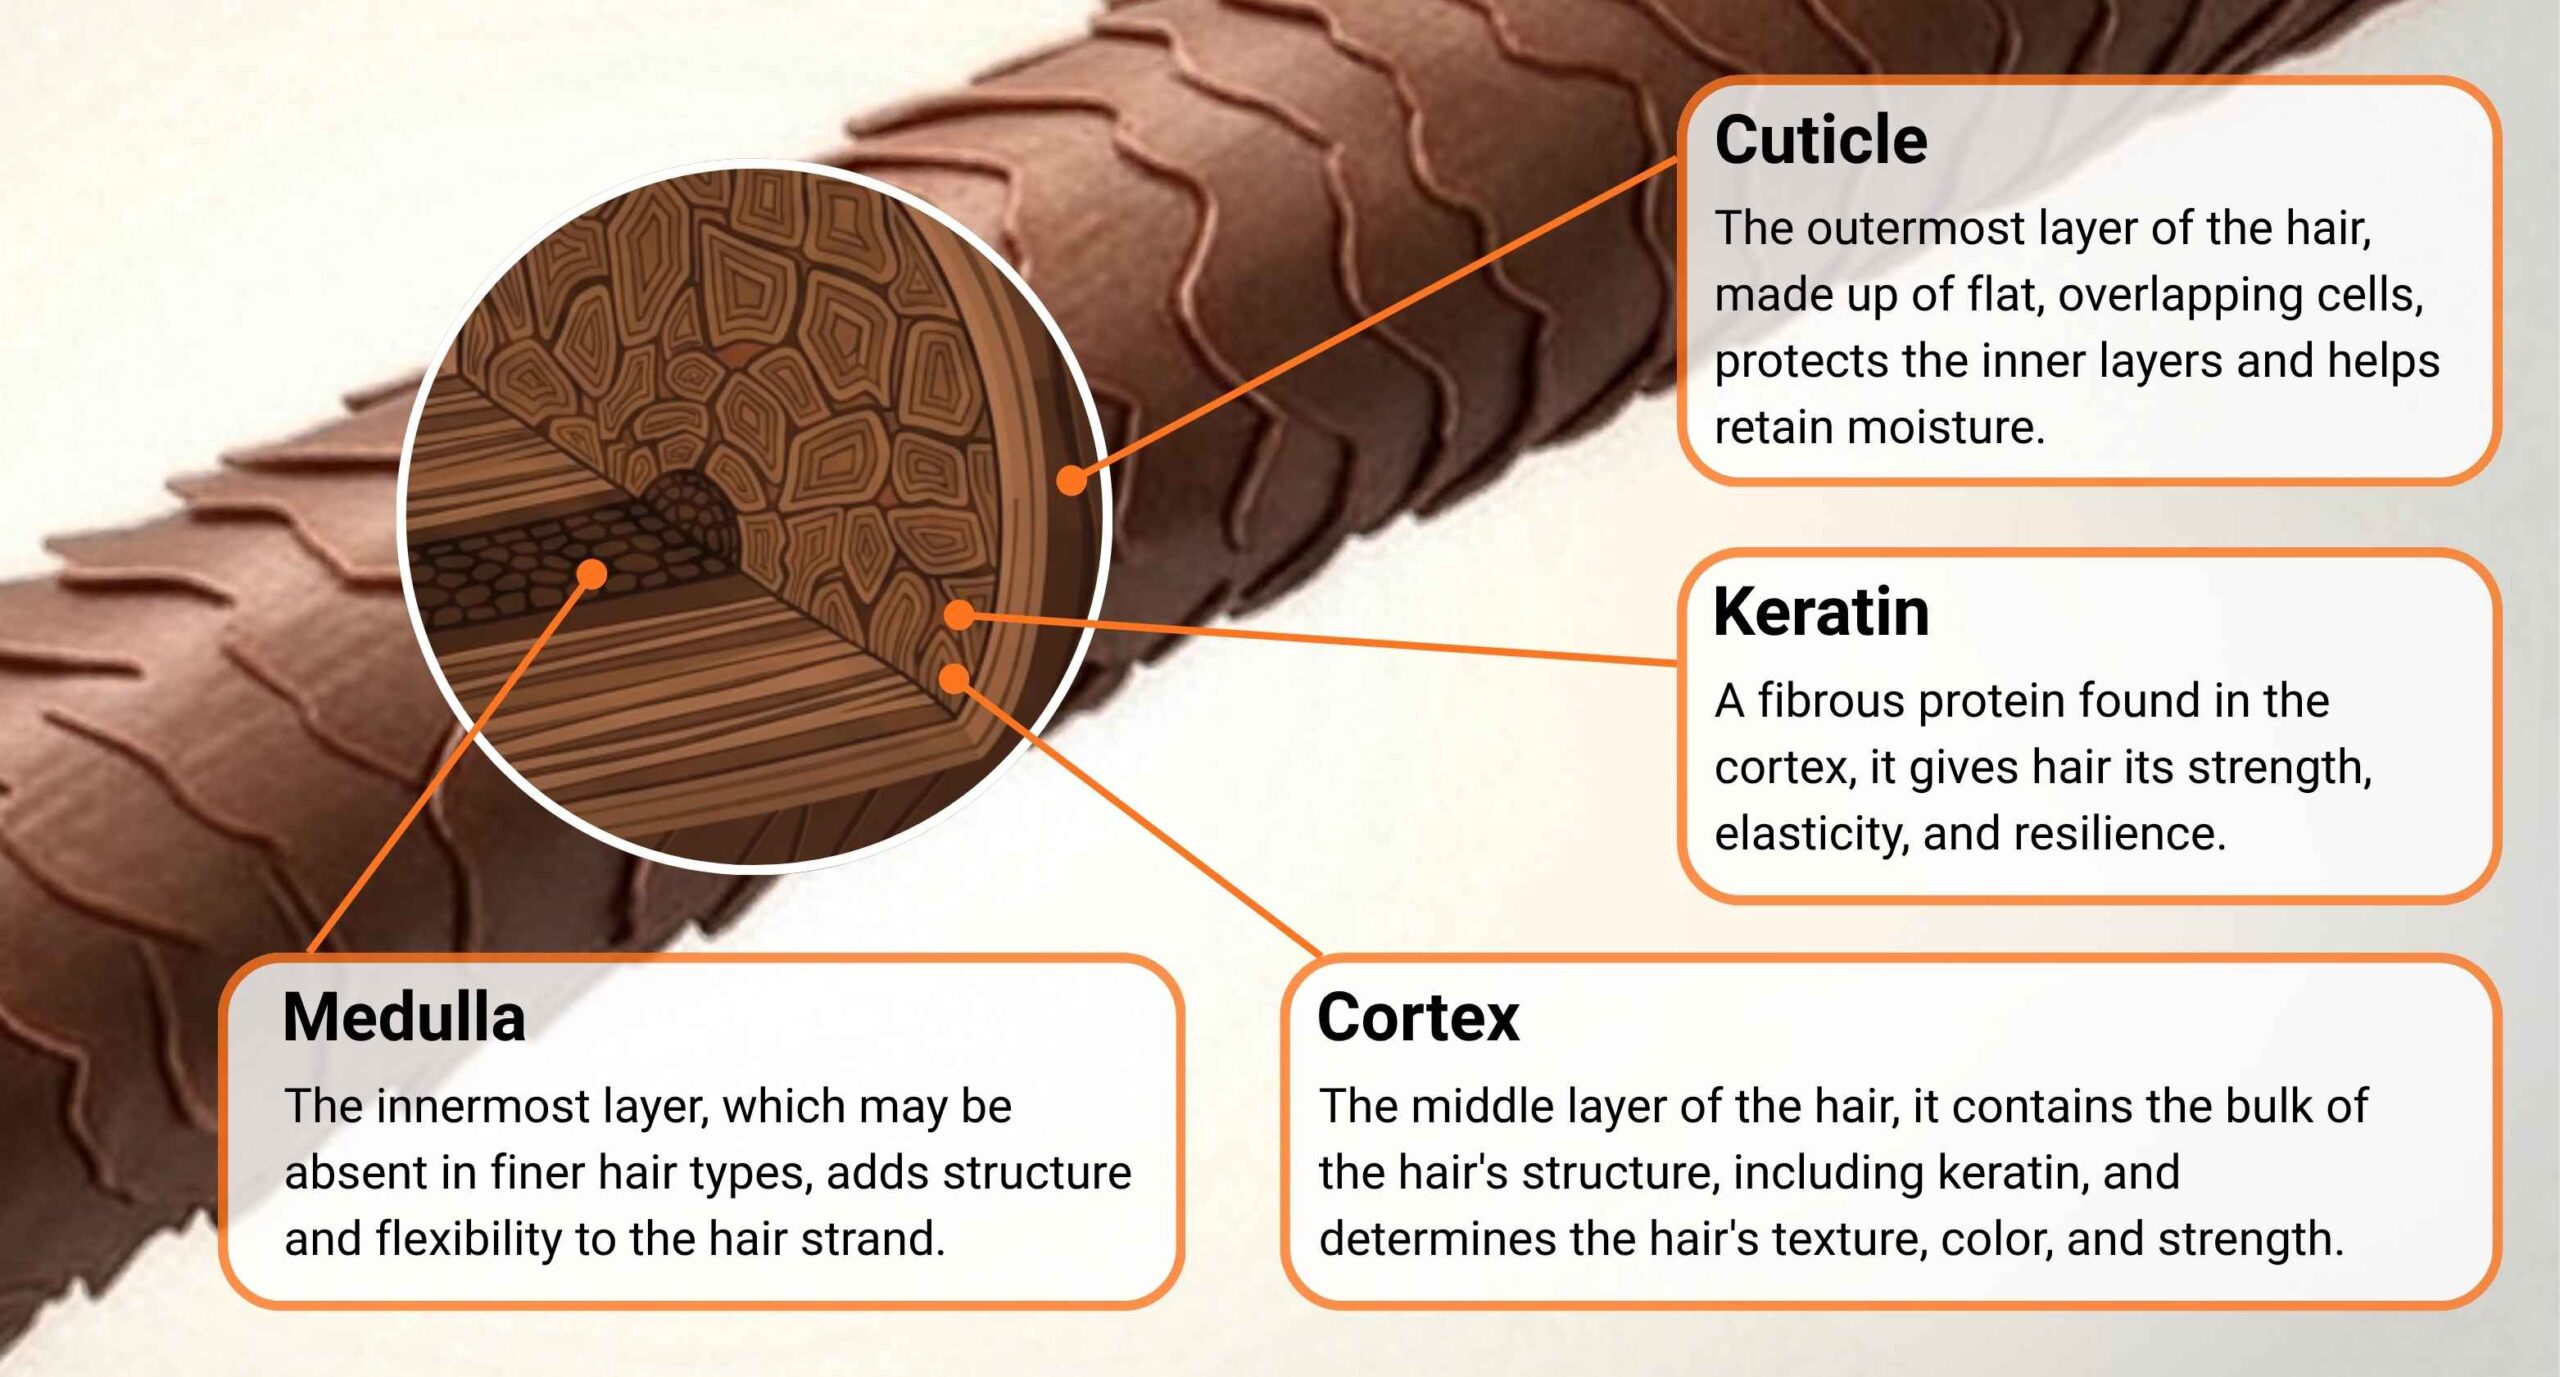
Hair color doesn’t just sit on the surface; it interacts with the internal structure of the hair strand. For a better understanding of this, you can refer to our article on 🔗 Hair Structure Explained: Cuticle, Cortex, and Tips for Healthy Hair”, which explains how the cuticle and cortex affect how hair absorbs, holds, and reflects color.
4. Technique 1: Balayage Ombré?
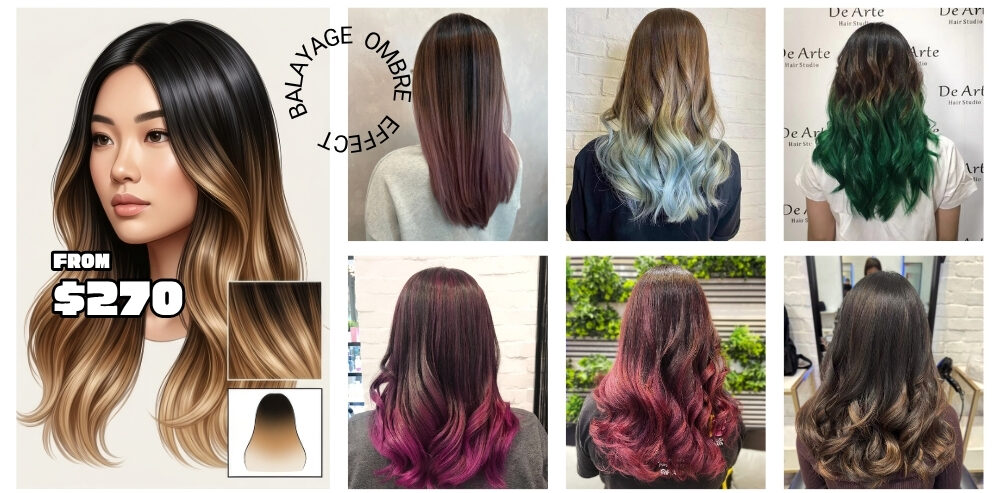
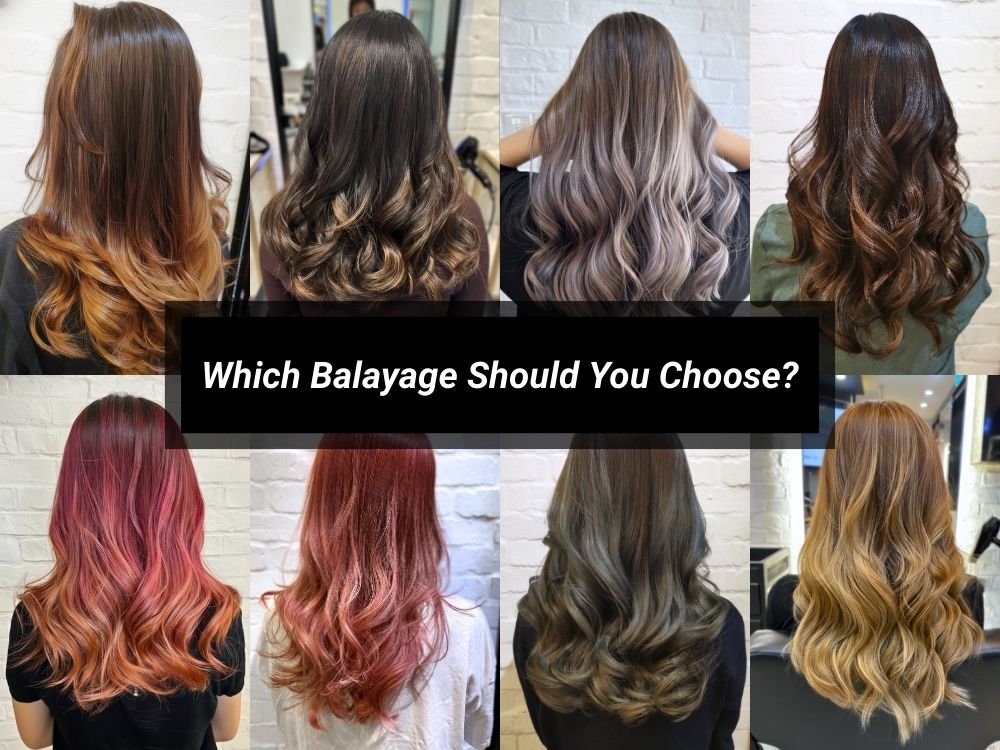
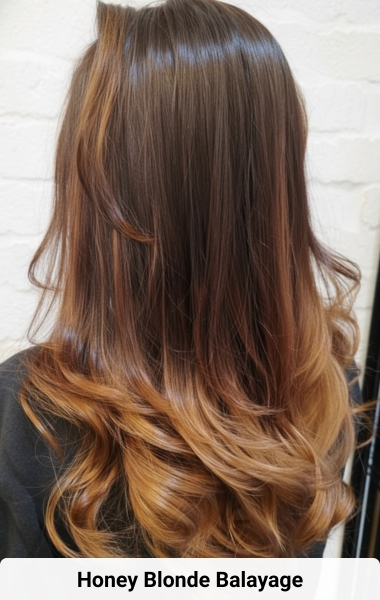
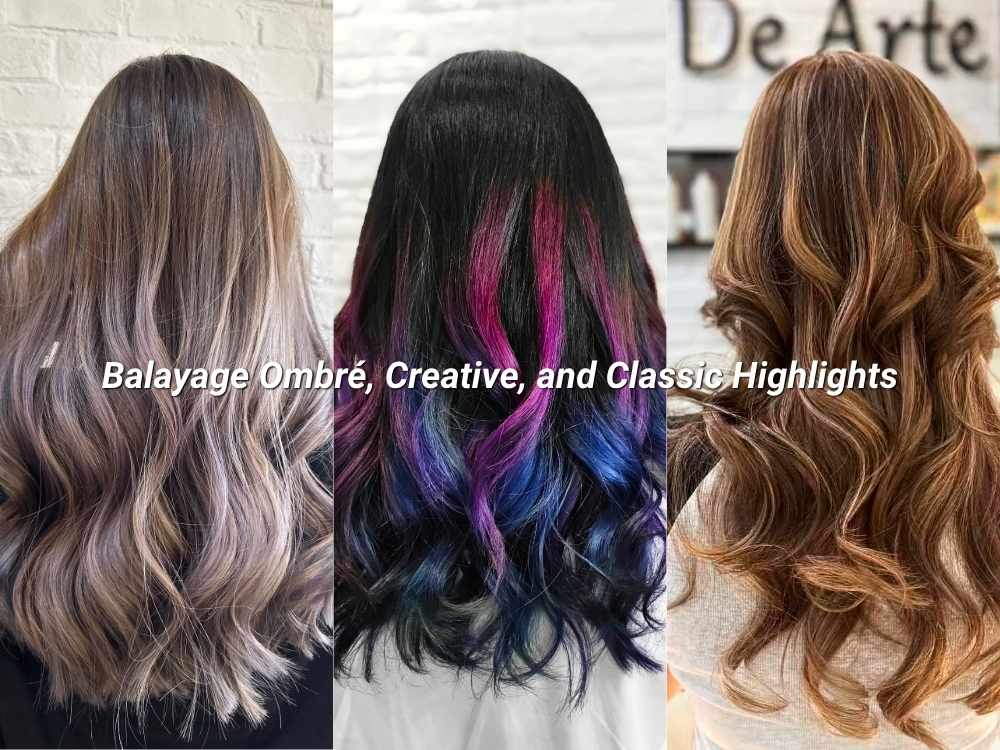
De Arte Hair Studio Balayage Ombre Highlights 1
Balayage Ombré combines the hand-painted artistry of balayage with the soft gradient of an ombré. This creates a natural-looking, multidimensional effect with soft transitions from root to tip.
Step-by-Step Process

1. Consultation: Discuss hair history, desired outcome, and lifestyle.
2. Sectioning: Divide hair into panels for control.
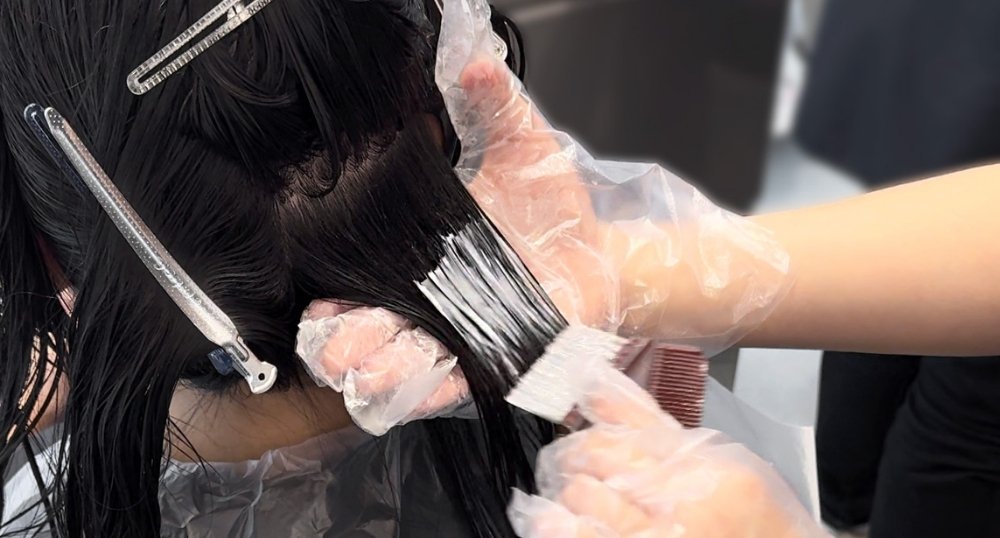
3. Painting: Apply lightener freehand from mid-lengths to ends. Root area is softly blended.
4. Processing: Allow hair to lift to the desired brightness.
5. Toning: Apply toner to neutralize unwanted warmth and refine the shade.
6. Finishing: Apply conditioning treatments, blow-dry, and style.

Best Hair Types & Textures

* Works on straight, wavy, or curly hair
* Ideal for those who want low-maintenance highlights
* Enhances natural movement and texture

Maintenance & Care

* Salon touch-ups every 4–6 months
* Use color-safe shampoos and conditioners
* Gloss treatments every 2–3 months for vibrancy

Styling Tips

* Loose waves enhance the gradient
* Air-dry with lightweight oil for shine
* Use a diffuser to maintain natural curl patterns

5. Technique 2: Creative Highlights
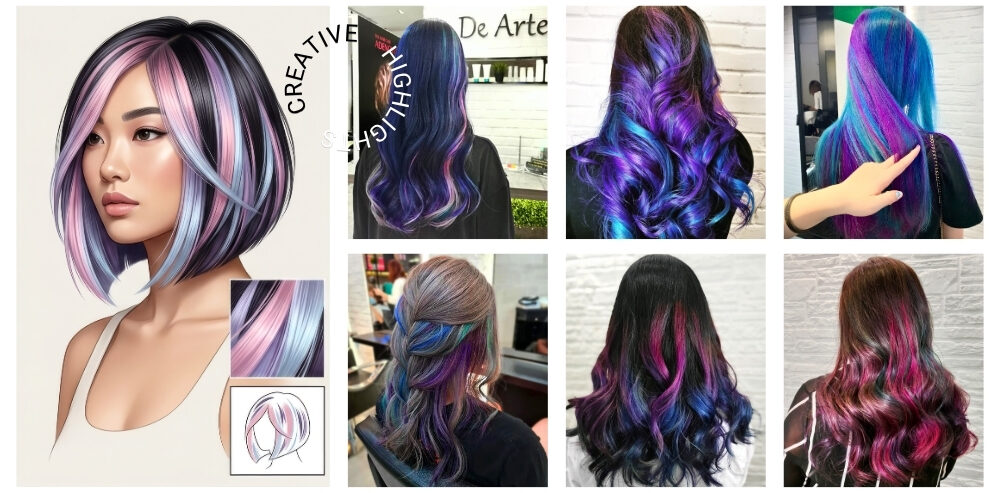
De Arte Hair Studio Creative Colors 2
Creative Highlights are bold, artistic color placements designed to make a statement. This technique is perfect for clients who want a high-fashion or editorial look.
Step-by-Step Process

1. Consultation: Choose color palette and placement strategy.
2. Sectioning: Asymmetric or geometric panels are defined for artistic effect.
3. Lifting: Dark hair is pre-lightened before applying vibrant fashion colors.
4. Color Application: Pastels, icy tones, or vivid shades are applied strategically.
5. Processing: Ensure even saturation and lift.
6. Finishing: Tone, treat, and style.

Popular Colors & Combos

* Pastel pink, lavender, and icy blue
* Vibrant copper or red streaks
* Ombre or peek-a-boo placement for movement

Maintenance & Care

* Frequent color refresh required
* Cold-water rinses prevent fading
* Sulfate-free, color-safe shampoos preserve pigments

Styling Tips

* Use straighteners or curling irons to highlight contrast
* Layered haircuts enhance artistic color placement
* Styling products that protect from heat help maintain vibrancy

6. Technique 3: Classic Highlights
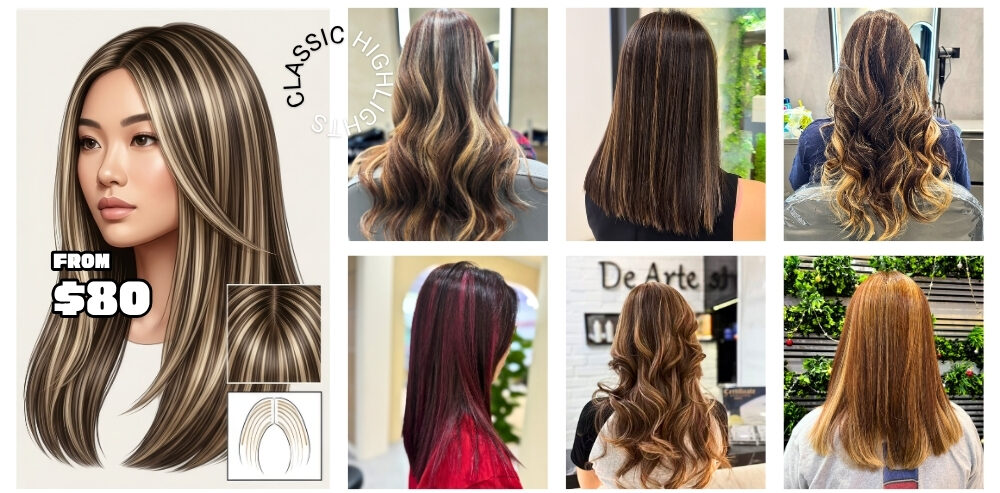
De Arte Hair Studio Classic Highlights 1

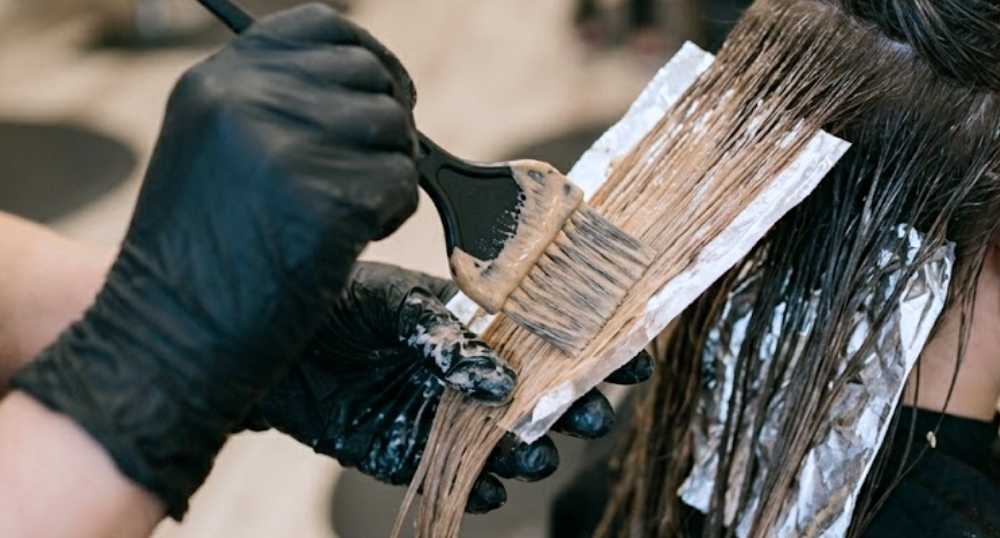
Classic Highlights, also known as foil highlights, are structured, uniform highlights that provide a polished, multi-dimensional look.

Step-by-Step Process

1. Consultation: Determine width and spacing of highlights.
2. Sectioning & Foiling: Weave fine sections and enclose in foils for precise lift.
3. Processing: Hair lifts evenly in foils.
4. Toning: Adjust shade for natural-looking brightness.
5. Finishing: Condition, blow-dry, and style.

Best Hair Types & Textures

* Straight, wavy, and slightly curly hair
* Works well for uniform coverage and structured looks
* Suitable for those who prefer traditional salon finishes

Maintenance & Care

* Touch-ups every 6–8 weeks
* Regular gloss treatments for shine
* Color-safe shampoos maintain crisp tones

Styling Tips

* Straight styles showcase precision
* Curls enhance multi-dimensional effects
* Highlighted layers add depth to simple cuts

7. Comparing Techniques: Which One Is Right for You?
FeatureBalayage OmbréCreative HighlightsClassic Highlights
Root BlendSoft, diffusedVaried, artisticPrecise, starts at root
PlacementHand-painted, freehandGeometric/asymmetricStructured, uniform weaving
MaintenanceLow (4–6 months)High (requires upkeep)Medium-High (6–8 weeks)
VibeEffortless, lived-inBold, editorialPolished, timeless
8. Common Mistakes and How to Avoid Them

* Too much lift too quickly: Can cause breakage, always consult a professional
* Ignoring undertones: Warm tones may appear; toning is essential
* Skipping maintenance: Even low-maintenance highlights benefit from gloss treatments
* Wrong product use: Sulfate shampoos fade color faster

FAQs About Hair Color and Highlights
1. What are highlights in modern hair color?

Highlights are sections of hair that are lightened or colored to create dimension, brightness, and contrast. In modern hair color, they are customized using techniques like balayage, foiling, or creative placement to suit individual style and hair type.

2. Which is better: balayage or highlights?

Neither is universally better, it depends on your goal.

  • Balayage is best for soft, natural, low-maintenance results
  • Classic highlights offer structured brightness and uniform lift
  • Creative highlights are ideal for bold, fashion-forward looks

A professional consultation helps determine the best option for your hair.

3. How long do highlights last?
  • Balayage Ombré: 4- 6 months
  • Classic Highlights: 6 – 8 weeks for root maintenance
  • Creative Highlights: 6 – 12 weeks depending on fashion color fading

Longevity depends on hair growth, aftercare, and color choice.

4. Do highlights damage your hair?

When performed professionally, highlights cause minimal damage. However, all lightening involves chemical lifting, so hair health depends on:

  • Proper formulation
  • Controlled processing time
  • Deep conditioning treatments
  • Home care routine

Healthy hair begins with professional technique and continues with proper maintenance.

5. Can I get highlights on dark hair?

Yes. Dark hair can absolutely be highlighted, but it may require multiple sessions depending on the desired level of lift. A skilled colorist will manage undertones and ensure the hair remains strong and glossy throughout the process.

6. What is the lowest maintenance highlight technique?

Balayage Ombré is the lowest maintenance option because the root is softly blended, allowing for a natural grow-out without harsh regrowth lines.

7. Why do highlights sometimes turn brassy?

Brassiness occurs when underlying warm pigments are exposed during lifting. This is common in lightening processes and is corrected with:

  • Toners
  • Purple or blue shampoos
  • Professional gloss treatments
8. Can highlights make hair look thicker?

Yes. Highlights create visual dimension and light reflection, which can make hair appear fuller, more textured, and voluminous.

9. How often should I tone my highlights?
  • Every 4–8 weeks depending on fade level
  • Fashion colors may require more frequent toning
  • Balayage may only need occasional gloss refreshes
10. What should I avoid after getting highlights?

Avoid:

  • High-sulfate shampoos
  • Excessive heat styling without protection
  • Chlorinated water without protection
  • Over-washing hair

These can reduce color longevity and shine.

11. How do I choose the right highlight style for me?

Consider:

  • Your lifestyle (low vs high maintenance)
  • Your fashion preference (natural vs bold)
  • Hair health and history
    Desired level of contrast

A consultation with a professional ensures the best match for your goals.

12. Can highlights be corrected if I don’t like them?

Yes. Color correction is possible through:

  • Toning adjustments
  • Rebalancing highlights
  • Lowlight application
  • Gloss treatments

However, correction is always easier when done by an experienced colorist from the start.

9. Choosing the Right Salon and Colorist

* Look for certified color specialists
* Review portfolios and client testimonials
* Ask about products, technique, and aftercare
* A consultation ensures the color matches your hair type, lifestyle, and desired outcome

New to De Arte Hair Studio? Read our 🔗 First Salon Visit: 7 Steps for New Customers to Feel Ready guide to understand what to expect during your consultation and appointment, helping you feel confident and prepared before your visit.

Why Expertise Matters

These colors may appear effortless once complete, but achieving seamless, healthy, and long-lasting results takes advanced technical skill. The difference between a good outcome and a truly transformative one often comes down to the colorist’s expertise, training, and precision.

Creating these looks involves more than simply applying lightener. A professional must also understand:

  • Hair structure and integrity: Knowing how much lift the hair can safely handle without compromising strength
  • Underlying pigment control: Managing warm, brassy undertones during the lifting process
  • Placement strategy: Designing highlights that complement face shape, haircut, and natural movement
  • Custom formulation: Adjusting developer strength, timing, and toning for each individual client
  • Aftercare guidance: Ensuring the client maintains color vibrancy and hair health at home

A skilled colorist doesn’t just “add highlights”, they design a personalized color system that enhances your features, lifestyle, and maintenance preferences.

Ready to transform your look?

Your Hair, Your Vibe: Book a personalized consultation with our master color specialists and discover the technique that brings your hair to life.
8 Signs of Over-Processed Hair and How to Repair the Damage

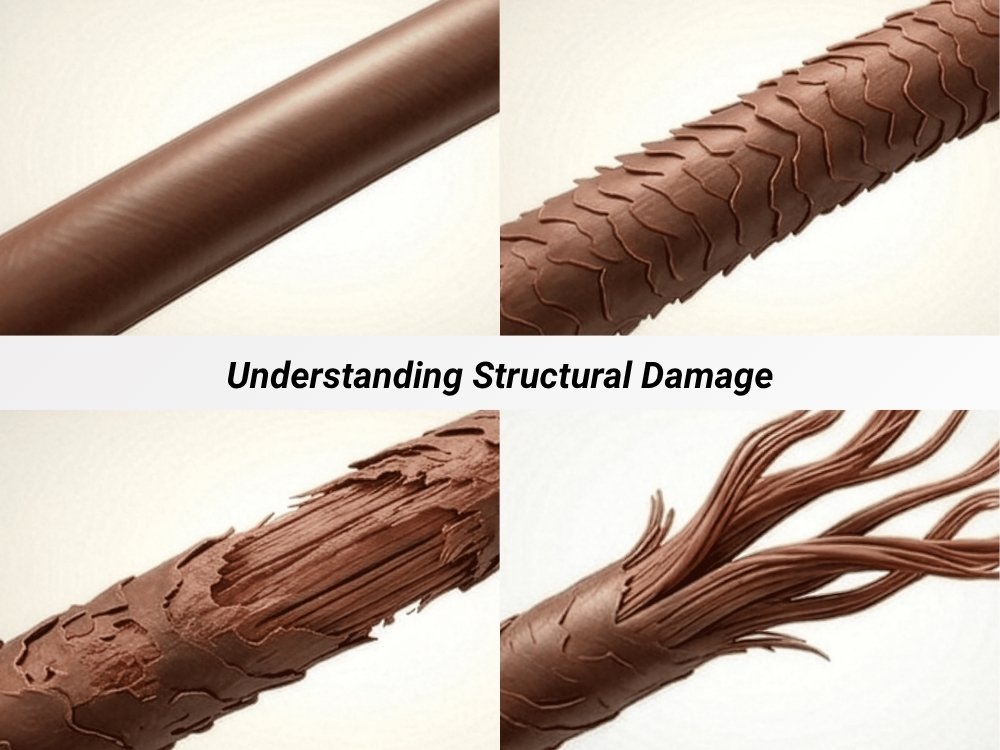
Understanding structural damage

Over-processed hair doesn’t happen overnight, but once it does, it’s hard to ignore. If your hair feels dry, brittle, frizzy, or keeps breaking no matter what you do, you’re likely dealing with structural damage from bleaching, coloring, perming, or repeated heat styling.

The thing is that while damaged hair cannot fully regenerate (because hair is not living tissue), but it can be significantly improved. With the right approach, you can restore strength, improve texture, and bring your hair back to a healthier state.

What Really Happens to Over-Processed Hair
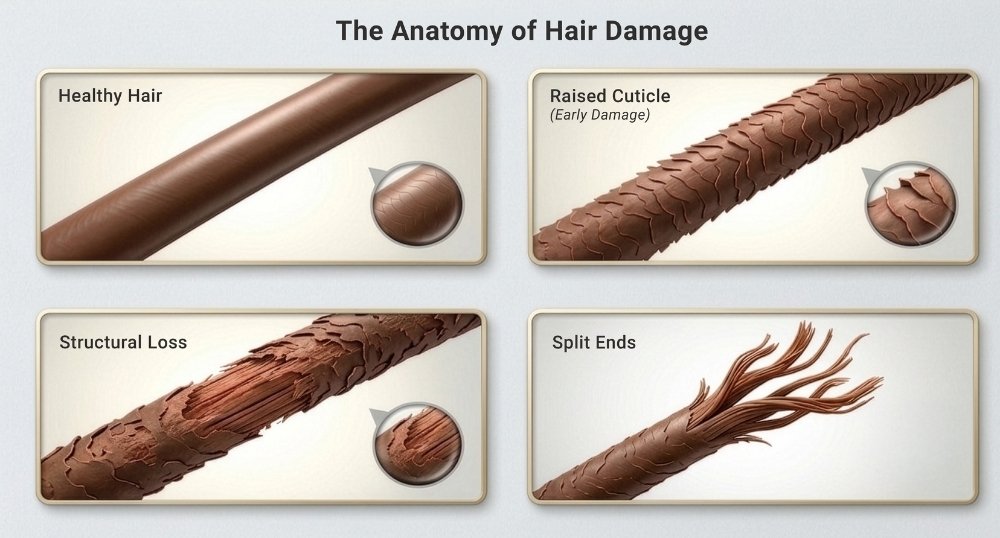
Over-Processed Hair The Anatomy of Hair Damage

When hair is exposed to repeated chemical or heat treatments, its internal structure begins to break down. This isn’t just surface dryness, it’s deep structural damage that affects how your hair behaves, feels, and responds to products.

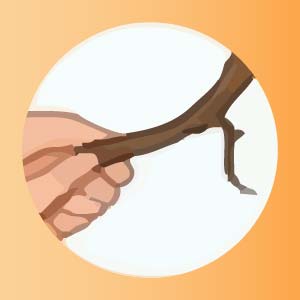
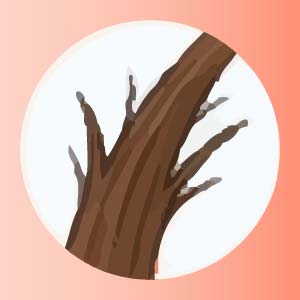
The four images illustrate the gradual breakdown of hair, starting with Healthy Hair, where the protective cuticle scales lie flat and smooth to lock in shine and moisture. In the second stage, the scales begin to lift and ruffle, making the hair feel rough and prone to tangles. This progresses to structural erosion, where the cuticle is stripped away to expose the fragile inner core, leading to extreme brittleness. Finally, the strand reaches terminal damage, where the inner fibers completely unravel, resulting in the frayed “split ends” that often require a trim to fix.

***

Here’s a clearer breakdown of what’s actually happening inside over-processed hair:
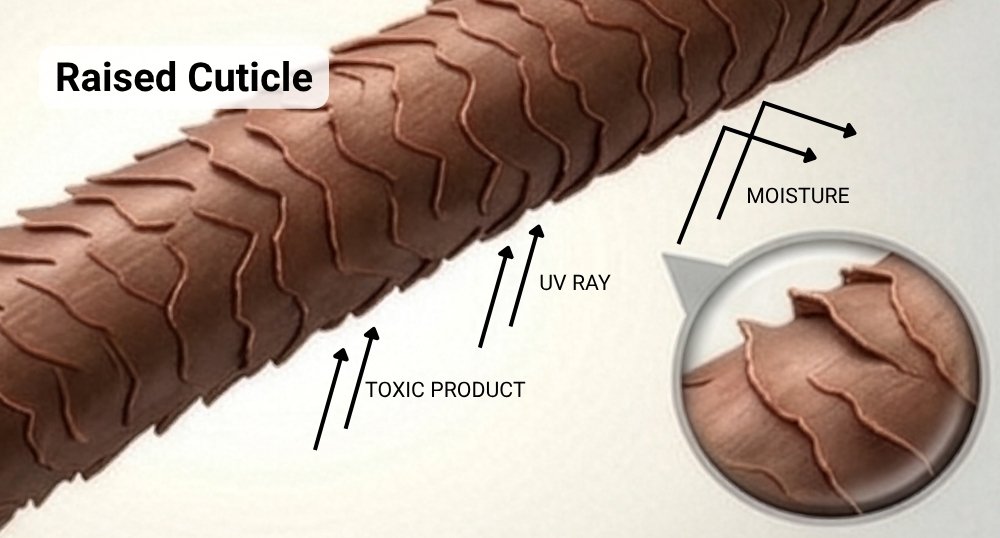
1. The Cuticle Becomes Damaged or Lifted (Raised)
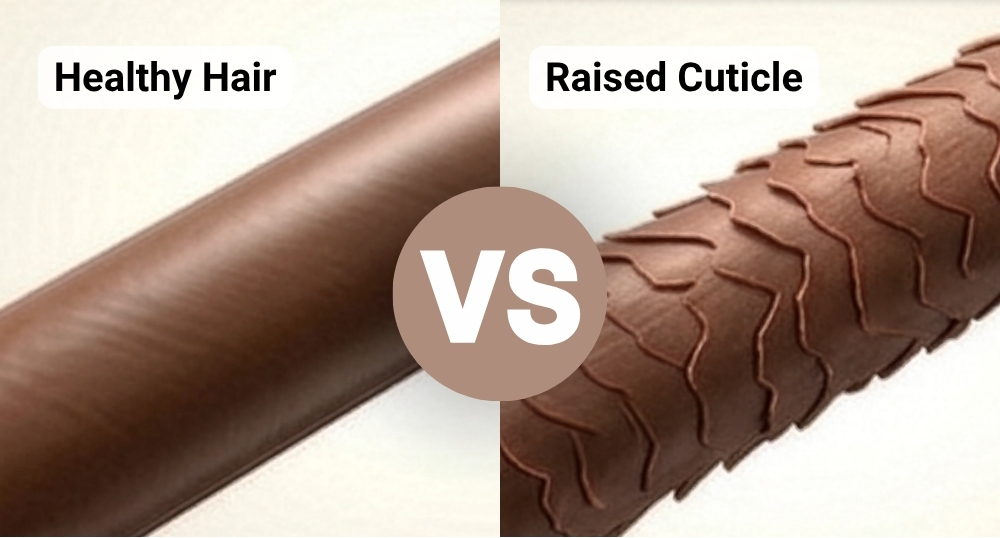
The cuticle is your hair’s outer protective layer. In healthy hair, it lies flat and smooth, locking in moisture and reflecting shine.

When over-processed:
  • The cuticle lifts, cracks, or chips away
  • Hair loses its smooth texture
  • Moisture escapes easily, leading to dryness

This is why damaged hair often feels rough and looks dull.

To fully understand this, it helps to first learn how hair is built:
🔗 Hair Structure Explained: Cuticle, Cortex, and Tips for Healthy Hair

2. Protein Loss Weakens Hair Structure
Inside the cortex, hair is made primarily of keratin protein. Chemical treatments break down this protein, weakening the strand from within.

As protein is lost:
  • Hair becomes fragile and prone to breakage
  • Elasticity decreases (hair doesn’t bounce back)
  • Ends split more easily

This is a core reason why protein-based hair restoration is essential.

3. Moisture Imbalance Leads to Brittleness
Over-processed hair struggles to retain moisture properly due to increased porosity.

You may notice:
  • Hair feels extremely dry when styled
  • Hair feels overly soft or stretchy when wet
  • Frizz becomes harder to control

This imbalance between protein and moisture is one of the biggest challenges in repairing damaged hair.

4. Broken Hair Bonds Reduce Strength and Flexibility

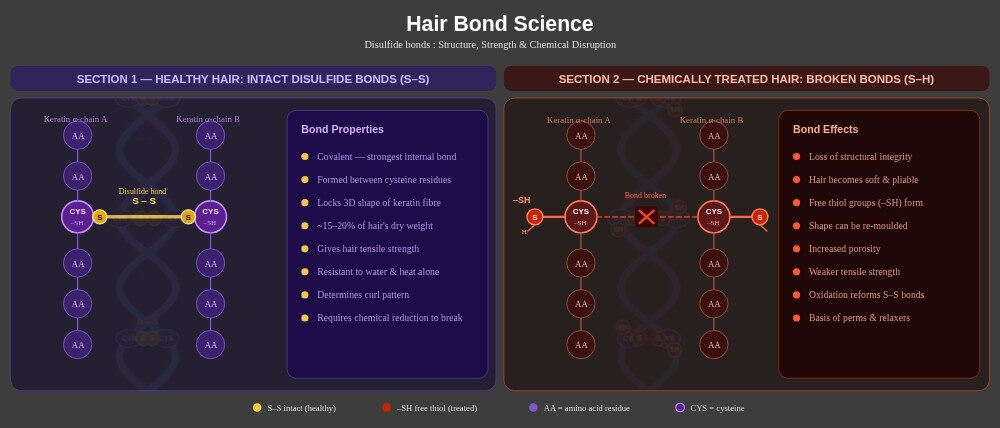
Internal bonds in hair, especially disulfide (S–S) bonds formed between cysteine residues in keratin, provide strength, elasticity, and natural shape. Chemical treatments like bleaching, perming, or relaxing break these bonds. When a disulfide bond is broken, each cysteine is left with a free thiol group (–SH); the reactive part of the amino acid that was formerly linked in the S–S bond.

With repeated or harsh processing:

  • Disulfide and other internal bonds can weaken permanently
  • Hair becomes more prone to breakage
  • Texture may become uneven, frizzy, or unpredictable
Modern bond-repair treatments work by restoring or reinforcing these bonds, helping hair regain strength, resilience, and manageability. The process often involves reforming S–S bonds from the free –SH groups, locking hair back into a stable structure.
5. Increased Porosity Causes Ongoing Damage

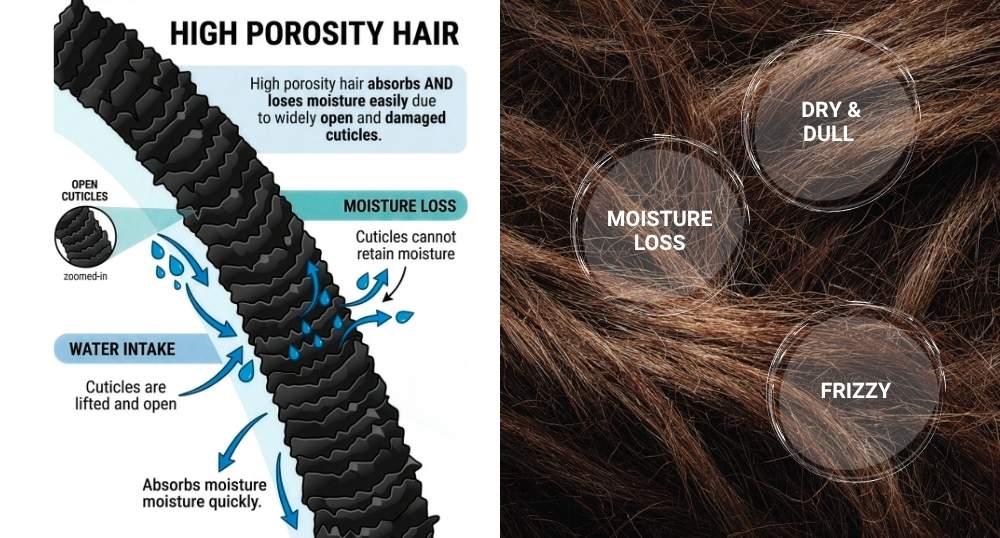
When the cuticle is damaged, hair becomes highly porous.

This means:

  • Water and products penetrate quickly but escape just as fast, which contributes to the moisture imbalance discussed earlier. Hair can feel dry when styled, overly soft or stretchy when wet, and harder to manage.
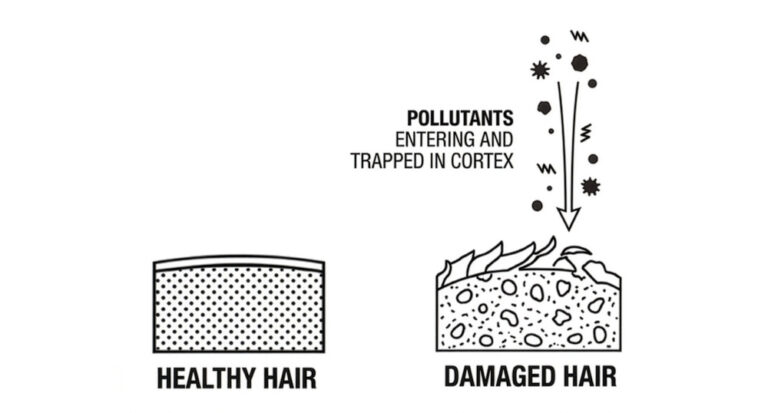
  • Pollutants and environmental stressors like UV rays, smoke, humidity, and heavy metals can slip through gaps in the cuticle and get trapped inside the hair. Once inside, they weaken the internal structure and break down the bonds that give hair its strength and shape, making hair even more fragile and prone to breakage, the same issues we highlighted earlier with bond damage.

Porosity is essentially hair “leaking from the inside out”, the more porous it is, the harder it is to retain moisture, protect itself, and keep products working effectively.

6. Tangling, Dullness, and Friction Increase
A damaged cuticle creates a rough surface instead of a smooth one.

As a result:
  • Hair tangles more easily
  • Strands catch onto each other
  • Shine is reduced because light isn’t reflected evenly

This is often one of the first visible signs of over-processing.

7. Damage Is Cumulative (And Often Overlooked)
One of the most important things to understand is that hair damage builds over time.

For example:
  • Bleaching already lightened hair
  • Rebonding or perming too frequently
  • Daily heat styling on chemically treated hair
All of these accelerate structural breakdown. Eventually, hair reaches a point where it can no longer tolerate further processing (often referred to as chemical burnout).
8. Surface Damage vs Structural Damage
Not all damage is the same, and this distinction matters.
  • Surface damage affects how hair feels (dry, frizzy) and can often be improved with conditioning
  • Structural damage affects the cortex and internal bonds, leading to breakage and requires deeper repair

Understanding this helps you choose the right damaged hair fix strategy, rather than relying on temporary solutions.

The Real Solution: Rebuilding Hair from the Inside Out

Fixing over-processed hair isn’t about using more products, it’s about using the right combination consistently.

Hair needs two things to recover: protein for strength and moisture for flexibility. Without protein, hair becomes weak. Without moisture, it becomes brittle. The balance between the two is what determines whether your hair feels healthy again.

This is exactly where targeted hair restoration treatments make the biggest difference.

Recommended Miyaki Hair Repair System
(Salon-Level Results at Home)
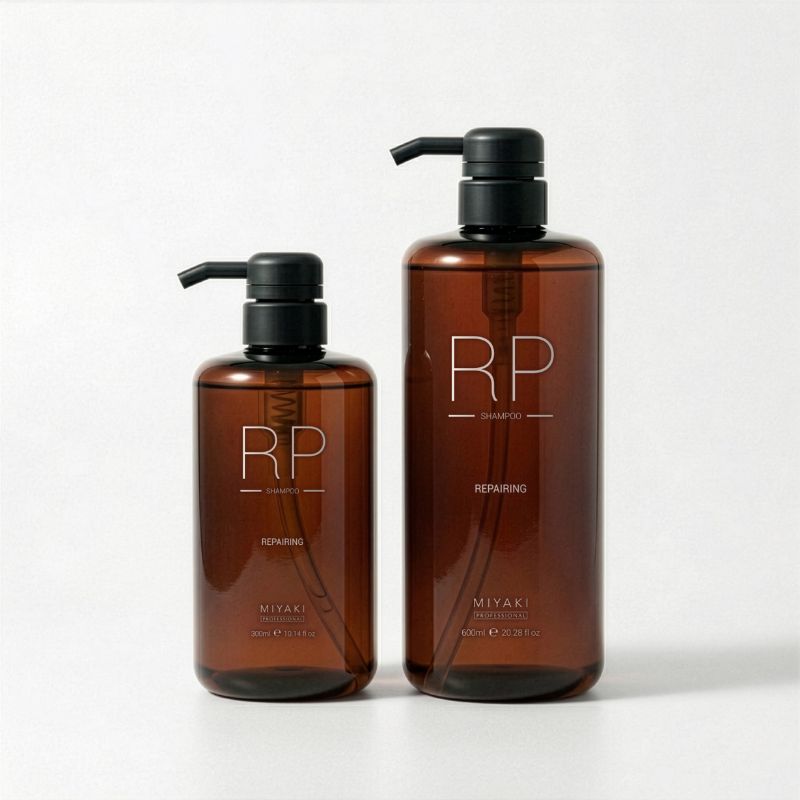
Miyaki Professional Repairing Shampoo

Select options This product has multiple variants. The options may be chosen on the product page

Deep Repair and Strength Restoration
Miyaki Repairing Shampoo
300/ 600ml

The Miyaki Repairing Shampoo is designed to gently cleanse hair and scalp while helping remove buildup that can weigh strands down or make them feel dull. Enriched with hydrolyzed keratin, it helps temporarily smooth the hair surface and improve the feel of weakened areas. Argan oil nourishes and softens hair, supporting moisture retention for enhanced manageability and reduced dryness. Humectants like butylene glycol and amino acids help maintain hydration, leaving hair feeling softer, more flexible, and easier to style. Ideal for hair exposed to bleaching, coloring, or frequent heat styling, this shampoo helps hair look cleaner, smoother, and more polished with every wash.

Intensive Strength + Fiber Repair
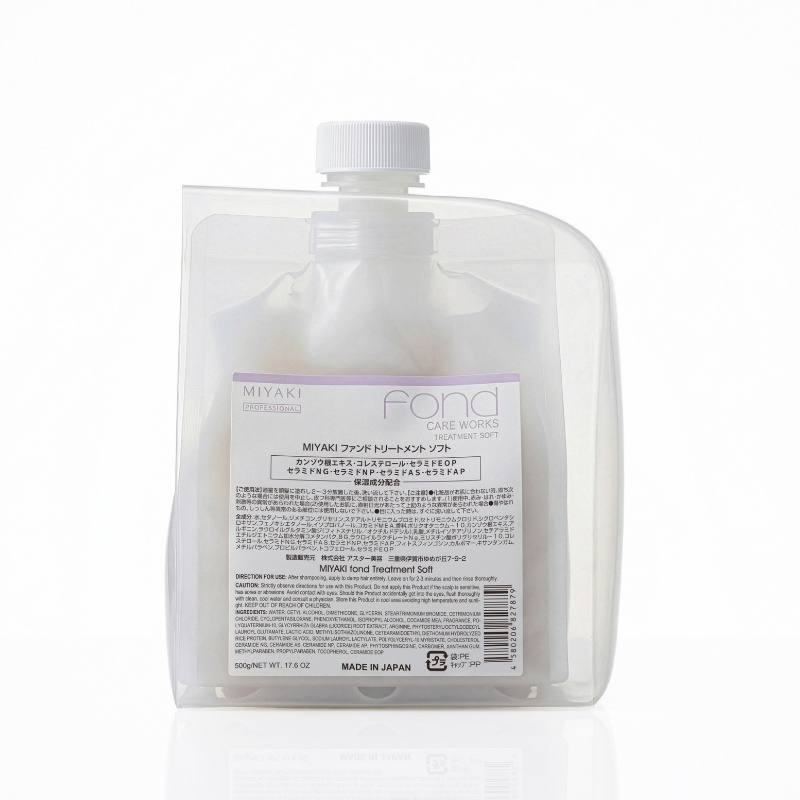
Miyaki Professional Fond Treatment Soft

500/ 1000ml

Miyaki Professional Fond Treatment Soft delivers intensive strength and fiber repair for weakened, damaged hair. Formulated with amino acids and hydrolyzed rice protein, it penetrates deep to reinforce the hair’s internal structure, improving elasticity and reducing breakage.

Ceramides and cholesterol help rebuild and protect the hair’s outer layer, locking in moisture and restoring smoothness and shine. Ideal for bleached, chemically treated, or stressed strands, this treatment strengthens, repairs, and softens from the inside out.

Daily Moisture Protection
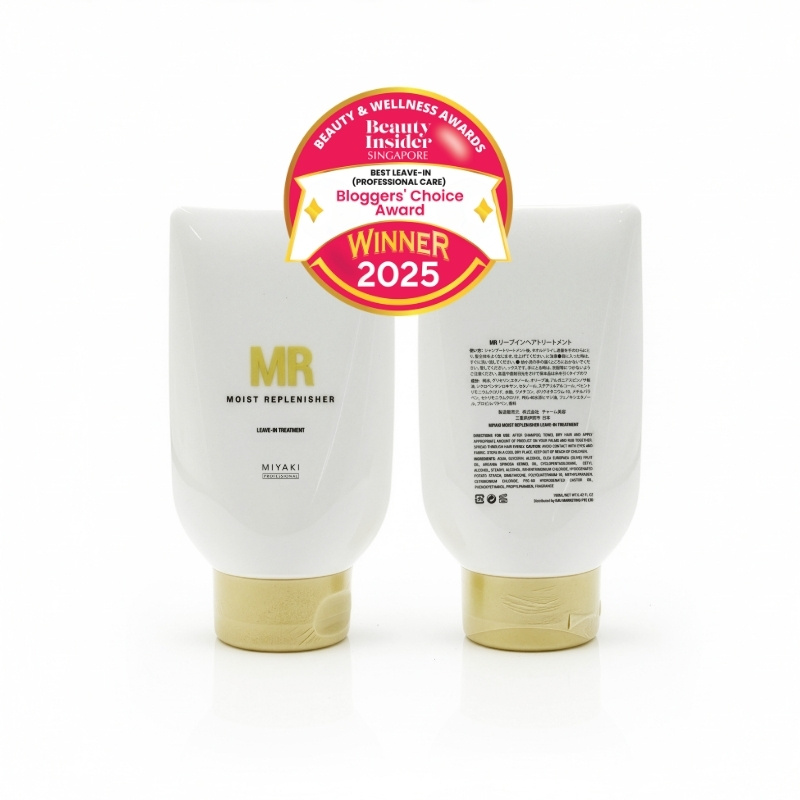
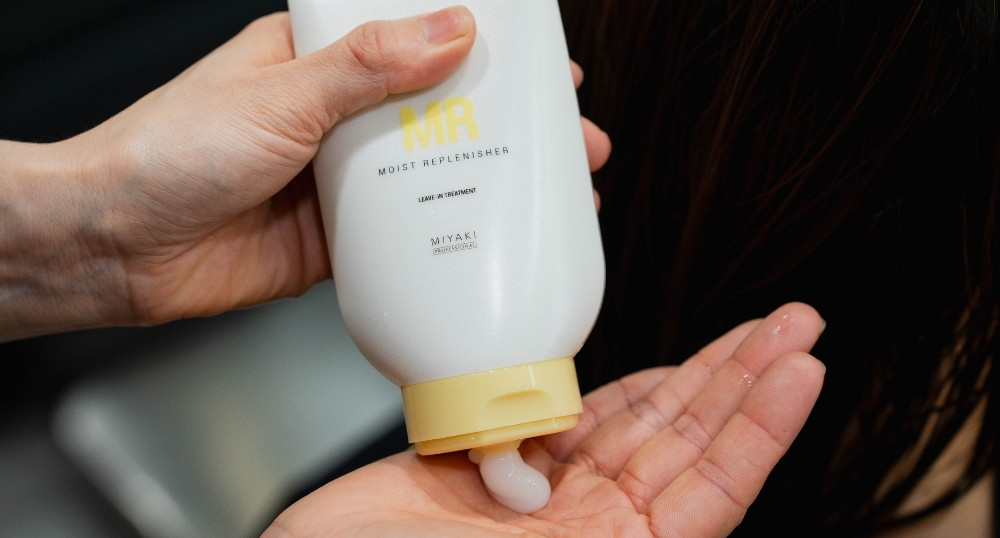
Miyaki Professional Moist Replenisher Leave-in Cream

190ml

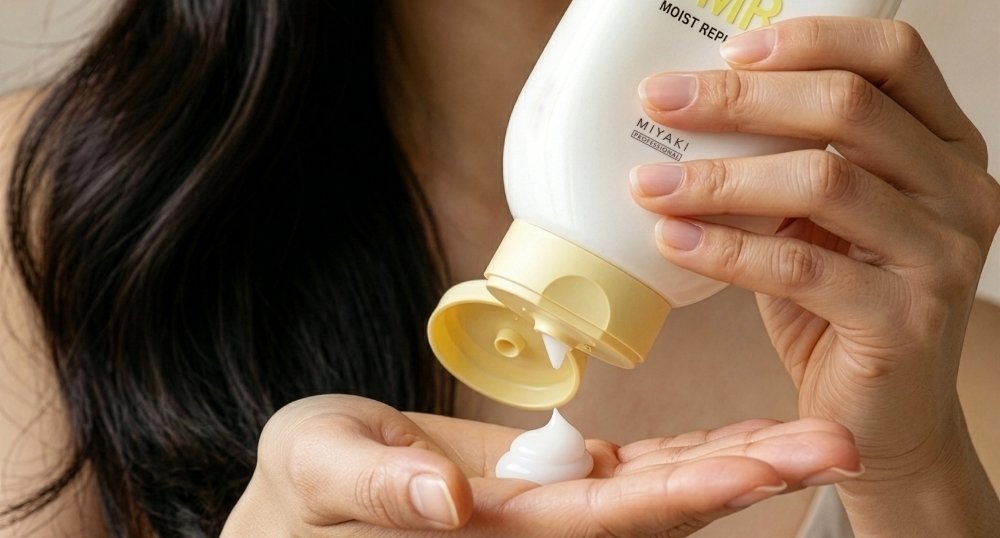
To maintain healthy-looking hair, consistent hydration and protection are key. Miyaki Professional Moist Replenisher Leave-In Cream helps replenish moisture while enhancing softness, smoothness, and manageability throughout the day. Its lightweight formula, enriched with glycerin, olive oil, argan oil, and conditioning agents, helps reduce frizz, minimize dryness, and protect fragile, over-processed hair from environmental stress. Ideal for hair weakened by bleaching, coloring, or frequent heat styling, this leave-in keeps strands nourished, smooth, and easier to style.

How to Actually Revive Damaged Hair (Without Overcomplicating It)

Most people overcomplicate hair repair. In reality, consistency matters more than complexity.

Start with a structured routine: repair treatments weekly, hydration regularly, and minimal heat exposure. Small habits, like being gentle when brushing or avoiding rough towel drying, can significantly reduce breakage over time.

Trimming remains necessary for severely damaged ends, as no treatment can permanently fix split ends. Hair shafts are made of dead tissue and cannot regenerate. While products like hydrolyzed proteins, oils, and silicones can temporarily smooth, strengthen, or protect hair, these effects are cosmetic, and true repair only occurs as new hair grows from healthy follicles.

Internal Resources for Deeper Hair Care Knowledge

If you’re interested to understand the different levels of chemical hair damage:
🔗 Mild to Severe: 7 Levels of Chemical Hair Damage

If your damage is caused by bleaching, you’ll want to understand the root cause:
🔗 Bleached Hair and Damaged Hair: What Bleach Really Does to Your Hair

If you’ve had a perm or chemical treatment, proper maintenance is key:
🔗 How to Maintain Your Perms: 8 Tips for Healthy, Long-Lasting Curls

When At-Home Repair Isn’t Enough...

If your hair feels gummy, overly stretchy, or continues breaking despite consistent care, it’s time for professional intervention. Salon-grade treatments can penetrate deeper into the hair structure and deliver more intensive repair.

Ready to Restore Your Hair?

If you’re serious about transforming your hair, not just managing damage, it’s worth getting expert help. Book your hair restoration consultation today and get a customized treatment plan tailored to your hair condition.

Healthy, strong, and revived hair isn’t about luck. It’s about the right strategy.

6 Essential Ways to Protect Your Hair from Heat Damage

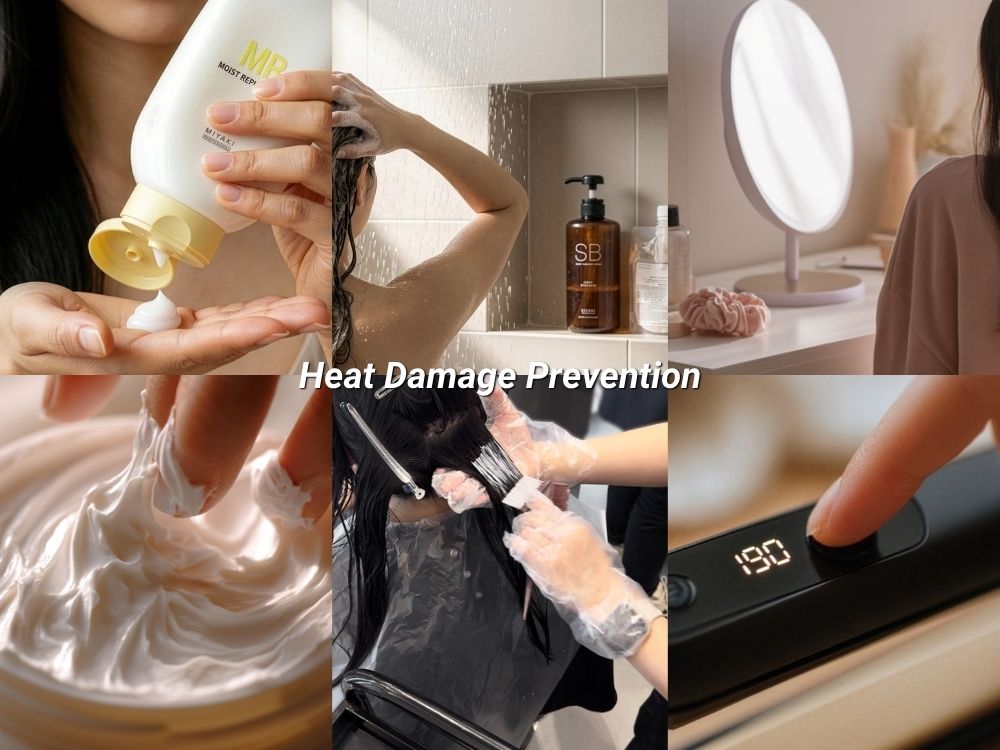
Heat Damage Prevention

Heat damage from styling tools like flat irons, blow dryers, and curling wands is often blamed for hair damage, but they’re not the only culprits. Environmental factors such as humidity, sun exposure, and pollution also contribute to dryness, frizz, and overall weakness. Over time, these stressors can lead to breakage and thinning. Fortunately, by adopting the right hair care practices, you can protect your hair from these daily challenges and maintain strong, shiny, and healthy hair.

In this guide, we’ll explore six essential ways to protect your hair from heat damage, humidity, and environmental stress, while promoting overall hair health.

1. Use Heat Protection Products

When styling your hair with heat tools, it’s essential to use a heat protectant first. You’ve probably heard this advice many times, but it’s just as important as applying sunscreen to your skin. While sunscreen can’t fully prevent freckles, it minimizes UV damage, and similarly, a heat protectant can’t eliminate all risks of heat damage but significantly reduces its impact on your hair.

Heat protectants create a barrier that locks in moisture and prevents direct heat from damaging the hair shaft. Though they can’t make your hair completely immune to heat damage, they lower the intensity of heat’s effects, helping to keep your hair healthier in the long run.

We do recommend Miyaki Professional Moist Replenisher Leave-In Cream, which not only protects your hair from heat but also moisturizes and detangles it. To get the best results, apply the leave-in conditioner after washing your hair. First, towel dry your hair and apply the product when it’s about 30-40% dry. Focus on the ends, where hair tends to be most damaged. Then, continue drying your hair to about 80-90% dry. If needed, you can apply a small amount of leave-in conditioner again for extra moisture and protection, or finish your styling routine with a hydrating serum to seal in moisture and add shine.

🔗 Check out our article on 10 Haircare Myths, where we debunk common misconceptions like Heat styling will always damage your hair.

***

2. Hydrate and Moisturize Regularly

Dry hair is more prone to frizz, breakage, and split ends. One of the most effective ways to protect your hair is by keeping it well-hydrated. Your hair’s ability to resist damage begins with proper moisture retention.

In humid and warm climates, your scalp can easily become oily or sweaty, which may lead to clogged pores. Over-washing your hair can strip away its natural oils, causing an imbalance that may lead to irritation or scalp problems such as dry flakes or scalp acnes (For more tips on caring for different scalp types, check out our article on 🔗 4 Common Scalp Problems in Singapore). Instead of washing your hair in the morning, try washing it at the end of your day and drying it thoroughly. This allows your scalp to naturally balance itself overnight, preventing excess oil and sweat from building up.

To hydrate your hair properly, start with a moisturizing shampoo and conditioner. Look for sulfate-free formulas like Miyaki Professional Repairing Shampoo, which is perfect for dry or damaged hair.

Sulfates, which are common in regular shampoos, can strip your scalp of its natural oils, leaving your hair brittle. Sulfate-free formulas are gentler and help maintain moisture, making them more suitable for dry or normal hair types. If you have an oily scalp, however, sulfate-based shampoos can help remove excess oil without causing additional dryness. For tips on how to choose the right shampoo for your scalp type, check out our article on 🔗 4 Easy Steps to Identify Your Scalp Type & Choose the Perfect Shampoo.

To lock in moisture, consider using leave-in conditioners or hydrating serums throughout the day. These products will keep your hair soft, shiny, and protected from environmental stressors.

***

3. Protect Your Hair from Humidity with Professional Salon Treatments

Humidity is one of the leading causes of frizzy hair. When the air is humid, moisture from the environment enters the hair shaft, causing the cuticle (the outer layer of the hair) to swell, leading to frizz. On the other hand, dry weather can strip your hair of essential moisture, making it brittle and prone to breakage.

To protect your hair from both humidity and dry conditions, consider incorporating anti-frizz treatments into your routine. Argan oil is a powerful ingredient for combating frizz. It’s rich in vitamin E, essential fatty acids, and antioxidants, which nourish the hair, lock in moisture, and smooth the cuticle. Argan oil also has anti-inflammatory properties, promoting a healthy scalp.

For a long-term solution that provides lasting frizz control, try our Argan Oil Texture Control professional salon treatment. This service focuses on nourishing your hair while reducing frizz and adding a brilliant shine. Formulated with natural ingredients like Argan Oil, Shea Butter, and Honey, the treatment deeply moisturizes and strengthens your hair, leaving it soft, shiny, and frizz-free for up to six months. It’s the ideal option for anyone seeking a gentler, more natural treatment.

To learn more about how this treatment can transform your hair, check out our article on 🔗Argan Oil Texture Control: The Ultimate Solution for Frizz-Free, Silky Hair in Just 1 Treatment.

***

4. Give Your Hair a Break from Heat Styling Tools

While heat styling tools like flat irons and curling irons are popular for achieving sleek, polished looks, overusing them can cause significant damage to your hair. High heat weakens the hair cuticle, leading to split ends, breakage, and dryness. The key to maintaining healthy hair is moderation.

Try taking regular breaks from heat styling to allow your hair to rest and recover. On heat-free days, experiment with braids, twists, or buns, which protect your hair from heat while still offering stylish results. These simple techniques will help reduce the cumulative damage caused by frequent heat exposure.

***

5. Use Deep Conditioning Masks

Deep conditioning masks are an excellent way to give your hair the nourishment it needs to stay healthy and strong. These masks provide intense hydration and repair damage, helping to restore moisture and elasticity.

Using a deep conditioning mask once or twice a week (or as needed) is a great way to keep your hair resilient to heat and environmental stress. Look for masks with ingredients like keratin, coconut oil, or shea butter, which help strengthen and hydrate the hair. To get the best results, leave the mask on for at least 20 minutes to allow the ingredients to deeply penetrate your hair.

***

6. Adjust Your Styling Tool Temperature

While it’s tempting to crank up the heat to speed up your styling routine, using high temperatures can do more harm than good. The higher the heat, the greater the risk of damaging your hair.

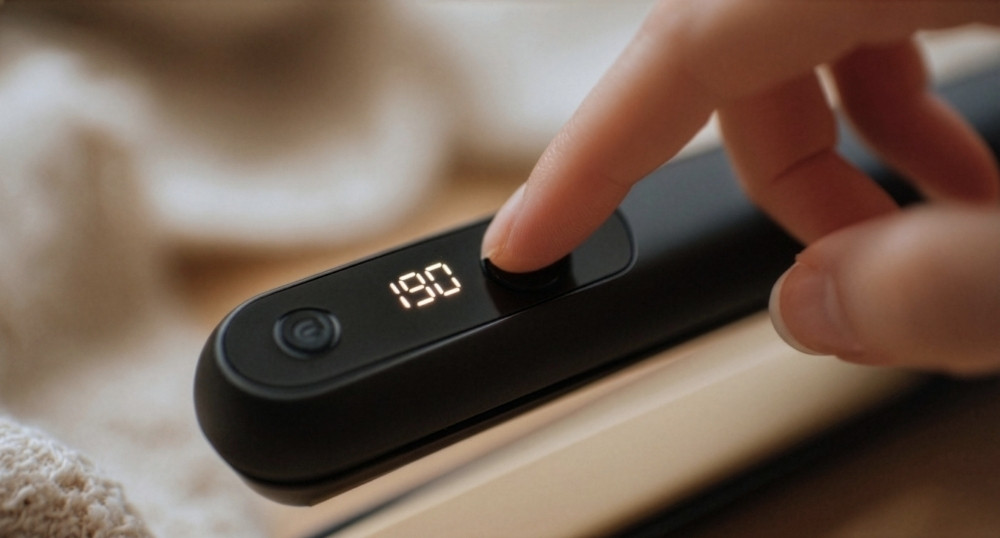
Instead, set your styling tools to a moderate temperature. For most hair types, a temperature of 175°C to 190°C (about 350°F to 375°F) is ideal. If you have fine or fragile hair, you can lower the temperature even further. Avoid using high heat for prolonged periods, as this can cause long-term damage to your hair strands.

By adjusting your styling tool temperature to the appropriate level, you can reduce heat damage and keep your hair looking healthy.

***

Bonus Tip: Nourish Your Hair from the Inside Out

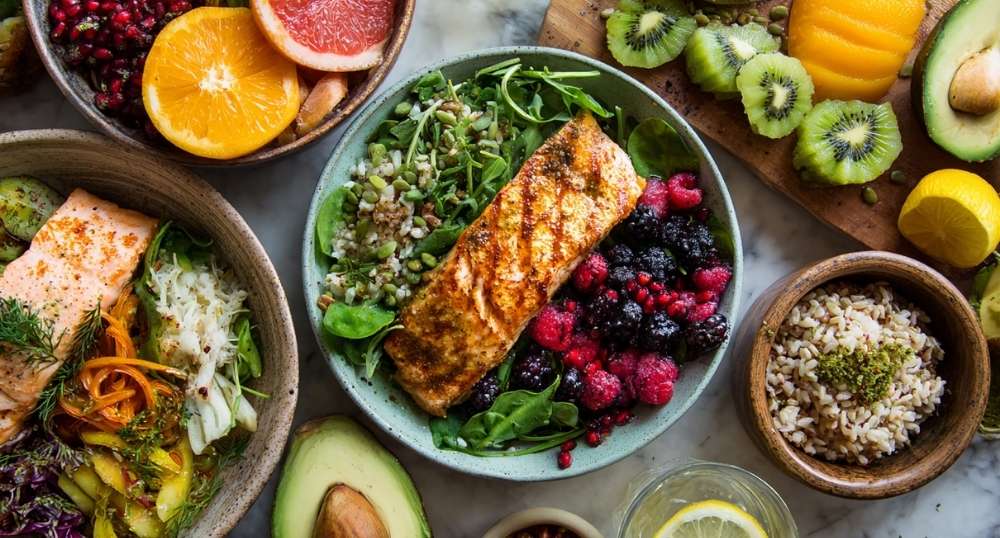
While no amount of external hair care will protect your hair if you’re not taking care of it from within, a well-balanced diet is key to supporting healthy hair growth. Hair is primarily made of keratin, a protein that requires specific nutrients to stay strong and healthy.

Incorporate foods rich in biotin, vitamin E, omega-3 fatty acids, and zinc to help support your hair’s health. Leafy greens, fatty fish, nuts, and seeds are great sources of these essential nutrients. By nourishing your scalp and hair follicles from the inside, you provide the foundation for stronger, healthier hair that’s more resilient to damage.

A healthy, nourished scalp creates a solid foundation for your hair, making it more resistant to environmental stressors and heat damage.

***

Protect Your Hair from Heat and Environmental Damage

Heat styling tools may be a primary cause of hair damage, but they aren’t the only culprits. Environmental factors such as humidity, sun exposure, and pollution also weaken your hair over time. However, by following the right hair care steps, like hydrating regularly, going for anti-frizz treatments, and taking breaks from heat styling, you can keep your hair healthy and strong.

Support your hair with a solid foundation through the right products and a nourishing diet, and you’ll give it the best chance of staying resilient to heat, humidity, and other environmental stressors.

Healthy Scalp Breakthrough Guide: What Causes Scalp Acne and How to Prevent It

What Causes Scalp Acne and How to Prevent It

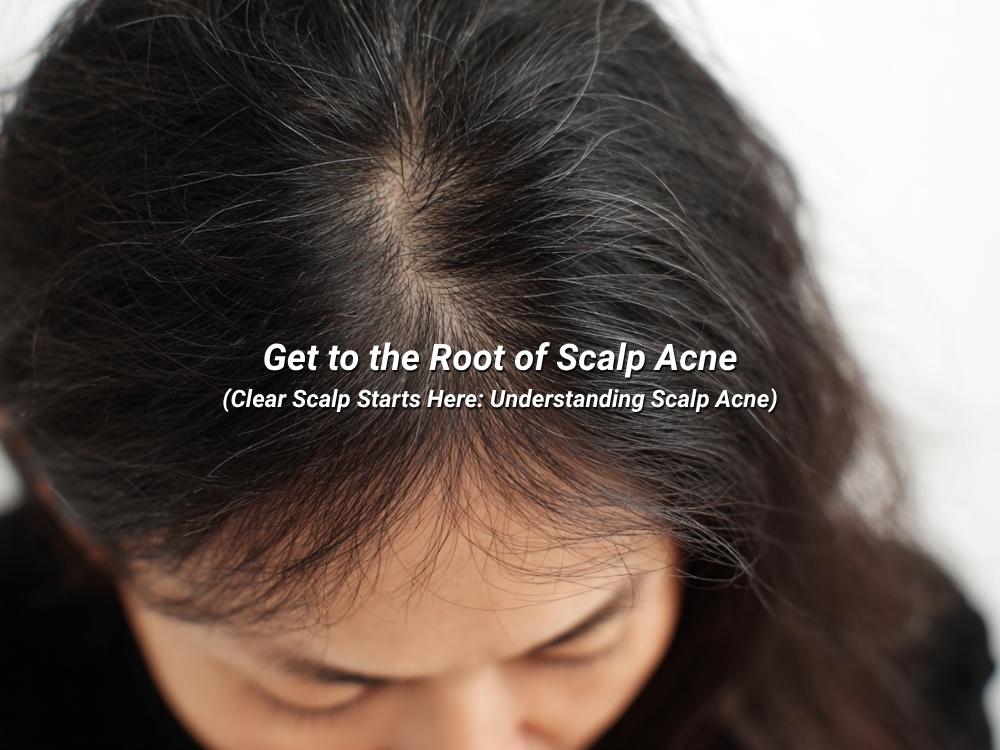
Scalp acne (often called scalp pimples) is a common condition that many people overlook or confuse with dandruff or irritation. In reality, it is a form of follicle inflammation, and it behaves very similarly to facial acne.

The good news? Once you understand how your scalp works like skin, scalp acne becomes much easier to manage and prevent.

What Is Scalp Acne?

Scalp acne is most closely linked to folliculitis, which is inflammation of hair follicles.

It develops when follicles become blocked by:
  • Sebum (natural oil produced by the scalp)
  • Dead skin cells
  • Sweat
  • Product residue
When trapped, these materials can lead to an overgrowth of microorganisms such as:
  • Cutibacterium acnes (bacteria associated with acne)
  • Malassezia (yeast that thrives in oily, humid environments)
Scalp Acne
Common Symptoms of Scalp Acne
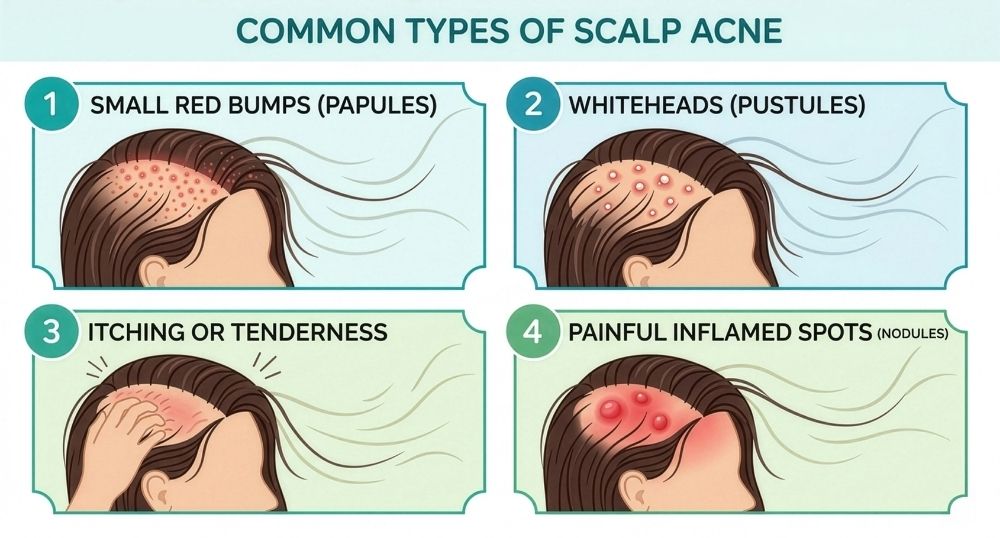
Small red bumps (Papules)

These are early-stage inflammatory acne lesions. Papules appear as tiny, raised red bumps on the scalp that feel firm to the touch. They do not contain pus, but they can feel slightly sore or sensitive. Papules form when hair follicles become irritated or mildly infected due to oil buildup, bacteria, or product residue. They are often the first visible sign that the scalp is becoming inflamed.

Whiteheads or pus-filled pimples (Pustules)

Pustules are similar to papules but are more advanced. They appear as red bumps with a white or yellow center filled with pus. This pus is made up of white blood cells, bacteria, and debris that the body sends to fight infection. Pustules may be tender or painful and can sometimes burst if irritated. They are commonly associated with clogged follicles and bacterial overgrowth.

Itching or tenderness
Many people with scalp acne experience itchiness or a sore, sensitive scalp even before visible pimples appear. This happens because inflammation irritates the surrounding skin and nerve endings. The sensation can range from mild discomfort to persistent itching, especially in areas with oil buildup, sweat, or product residue.
Occasionally painful inflamed spots (Nodules)
Nodules are a more severe form of scalp acne. They appear as large, deep, and painful lumps under the skin without a visible head. Unlike surface pimples, nodules form deep within the hair follicle and involve more intense inflammation. They tend to last longer, feel hard or swollen, and may increase the risk of scarring if not treated properly.

Scalp acne symptoms can range from mild surface bumps (papules) to deeper, more painful lesions (nodules), often accompanied by itchiness and sensitivity due to inflammation.

***

Your Scalp Is Skin too!

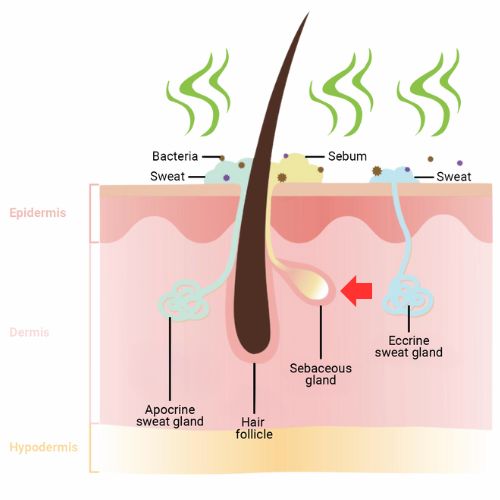
A key misconception is treating the scalp as “just hair.” In reality, your scalp is also skin with hair growing from it

It contains:
  • Hair follicles (pores)
  • Sebaceous glands (oil glands)
  • Skin microbiome* (good + bad microbes)

What is microbiome?

👉 The microbiome = all the bacteria, fungi, and other microbes that live in a specific area (like your scalp, skin, or gut)

Your scalp is home to a natural microbiome (a balanced ecosystem of bacteria and yeast that helps keep your scalp healthy). This includes microorganisms like Cutibacterium acnes and Malassezia, which normally live on your scalp without causing problems.

However, when this balance is disrupted, i.e. often due to excess oil, sweat, heat, humidity, or product buildup, certain microbes can overgrow. This overgrowth can irritate hair follicles, trigger inflammation, and lead to scalp pimples or acne.

Important difference from facial skin:
* The scalp has more oil glands, making it more prone to oil buildup
* It is usually covered by hair, creating a warmer, more humid environment
👉 Together, these factors increase the chances of scalp acne. Not because the skin is weaker, but because the conditions favor breakouts.

***

Is the Scalp More Sensitive Than Facial Skin?
Short answer: No.
✅ What is true:
  • The scalp is not inherently more sensitive than facial skin
  • It has a slightly thicker protective layer
Why it feels more sensitive:
The scalp becomes reactive due to its environment:
  • Higher sebum (oil) production
  • Heat and humidity
  • Sweat trapped under hair
  • Product buildup
  • Occlusion from hats, helmets, or hairstyles

👉 The scalp is not naturally more sensitive, but it is more prone to becoming irritated or inflamed.

***

What Causes Scalp Pimples?
1. Excess Oil Production
The scalp naturally produces sebum, but excess oil can:
  • Mix with dead skin cells
  • Clog hair follicles
  • Trigger inflammation
2. Microbial Imbalance
Scalp acne is linked to:
  • Bacterial overgrowth (Cutibacterium acnes)
  • Yeast imbalance (Malassezia)

These thrive in warm, oily, humid environments.

3. Product Buildup
Residue from hair products can accumulate over time:
  • Dry shampoo
  • Styling gels or waxes
  • Conditioner applied too close to the scalp

This acts like “blocked pores” on facial skin.

4. Sweat, Heat & Humidity
Sweat itself does NOT cause acne. However, when sweat is:
  • Trapped
  • Mixed with oil
  • Left unwashed

It increases the risk of clogged follicles and bacterial growth. This is especially common in hot, humid climates like Singapore.

5. Damp Scalp & Poor Drying Habits
This is often misunderstood.
✅ What is true:
  • Warm + moist environments promote microbial growth
  • Leaving hair damp for long periods can increase irritation risk
  • Covered damp hair (e.g., sleeping or tying it up) increases risk further
❌ What is false:
  • Water alone causes acne

It’s not “wet hair = acne,” but prolonged dampness + heat + occlusion = higher risk of scalp breakouts

6. Friction & Mechanical Stress
Repeated pressure or rubbing can trigger breakouts:
  • Helmets
  • Caps
  • Tight hairstyles

***

How to Prevent Scalp Acne
1. Cleanse Like You Care for Facial Skin
  • Choose a shampoo suited to your scalp type
  • Avoid both overwashing and underwashing
2. Always Dry Your Scalp Properly
One of the most overlooked but important steps.

Best practices:
  • Do not sleep with wet hair
  • Dry scalp after washing
  • Use low or cool heat if blow-drying
  • Avoid tying hair when damp
These reduces moisture buildup that can trigger irritation.
3. Use Targeted Active Ingredients
Look for clinically supported ingredients:
  • Salicylic acid → unclogs follicles
  • Ketoconazole → reduces yeast overgrowth
  • Zinc → helps control bacteria and inflammation
4. Prevent Product Buildup
  • Avoid applying conditioner to scalp
  • Limit heavy styling products
  • Use clarifying shampoo occasionally
5. Maintain Scalp Hygiene Habits
  • Wash after sweating
  • Change pillowcases regularly
  • Clean helmets and hats

***

Professional Scalp Treatments (Deeper Reset)
When scalp acne is persistent, professional treatments can help restore balance.
These treatments typically focus on:
  • Deep cleansing clogged follicles
  • Removing excess buildup
  • Rebalancing scalp oil levels
  • Calming inflammation
Detoxifying Herb Infusion
This treatment supports scalp health using:
  • Herbs extracts to soothe irritation
  • Detoxification techniques to remove buildup
  • Circulation support for healthier follicles

Think of it as a professional facial treatment, but for your scalp.

🚫 Common Myths About Scalp Acne
❌ “Wet hair causes scalp acne”

Not directly, only prolonged dampness in the wrong environment increases risk.

❌ “You just need to wash more”

Overwashing can strip natural oils and worsen imbalance.

❌ “Scalp care is just hair care”

Your scalp is living skin, it needs skincare-style attention.

***

Your Scalp Deserves Skin-Level Care

Scalp acne is not random, it develops due to a combination of:

  • Oil imbalance
  • Clogged follicles
  • Microbial activity
  • Environment and habits

The most important shift you can make is this: Treat your scalp like your skin, not just your hair.

With the right routine and awareness, scalp acne is highly manageable.

***

Book a Professional Scalp Assessment Today
If you’re experiencing:
  • Recurrent scalp pimples
  • Painful or inflamed bumps
  • Persistent oiliness or buildup
  • No improvement with home care
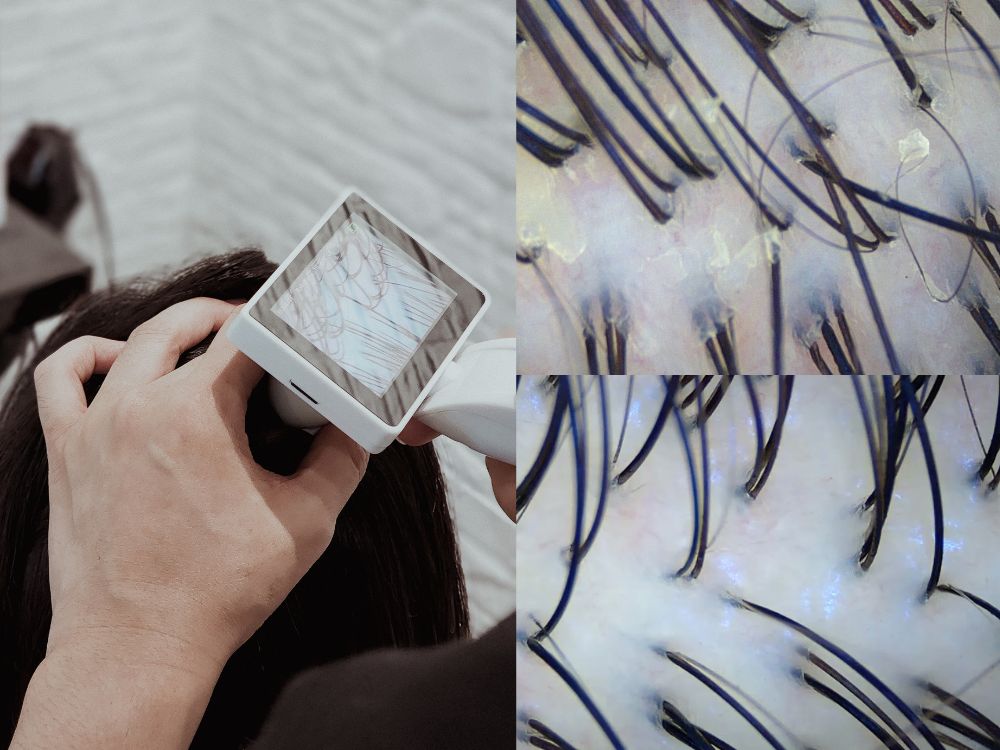
A professional scalp analysis can help identify the root cause and guide targeted treatment.
What you can expect:
  • Scalp condition analysis
  • Oil and sensitivity assessment
  • Follicle and buildup evaluation
  • Personalized treatment recommendation

Ready for a clearer, healthier scalp?

Book your scalp consultation today and take the first step toward long-term scalp health and confidence.

7 Tips for the Perfect Color Match for Your Skin Tone

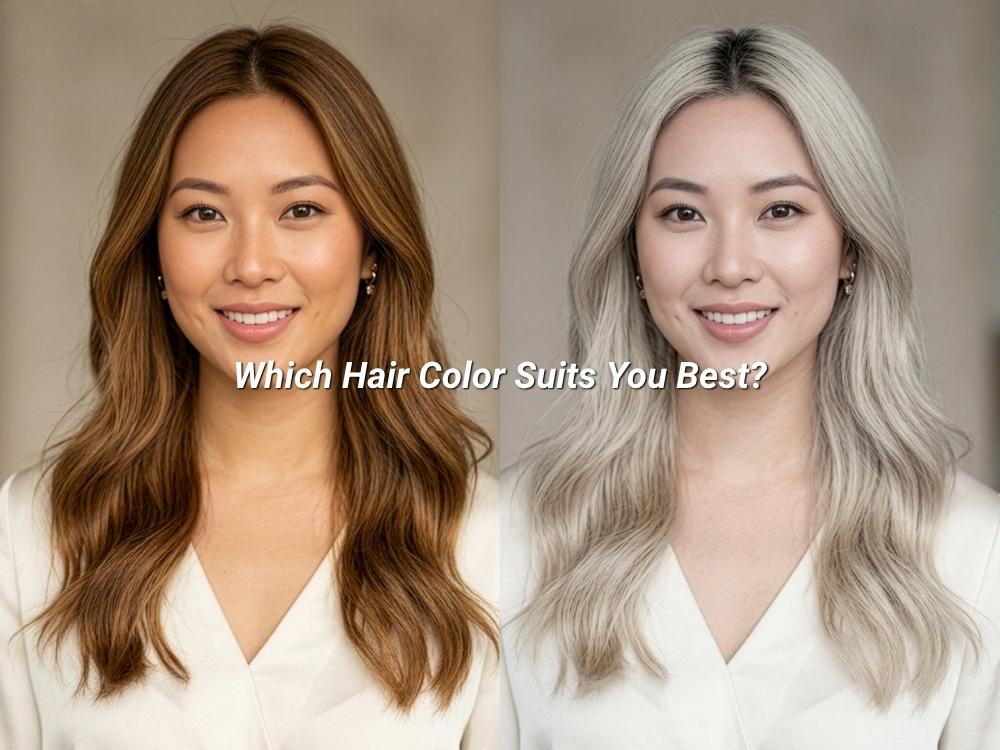
Color Match Skin Tone Which Hair Color suit you better

Color match is one of the most important factors when choosing a hair color that flatters your skin tone. The right hair shade can enhance your features, give your complexion a healthy glow, and boost your confidence. On the other hand, the wrong shade can make your skin look dull or washed out. Understanding your skin tone and how it interacts with hair colors is key to a flawless, harmonious look. This guide shares 7 practical tips to help you find the perfect hair color and maintain it beautifully.

1. Identify Your Skin Tone

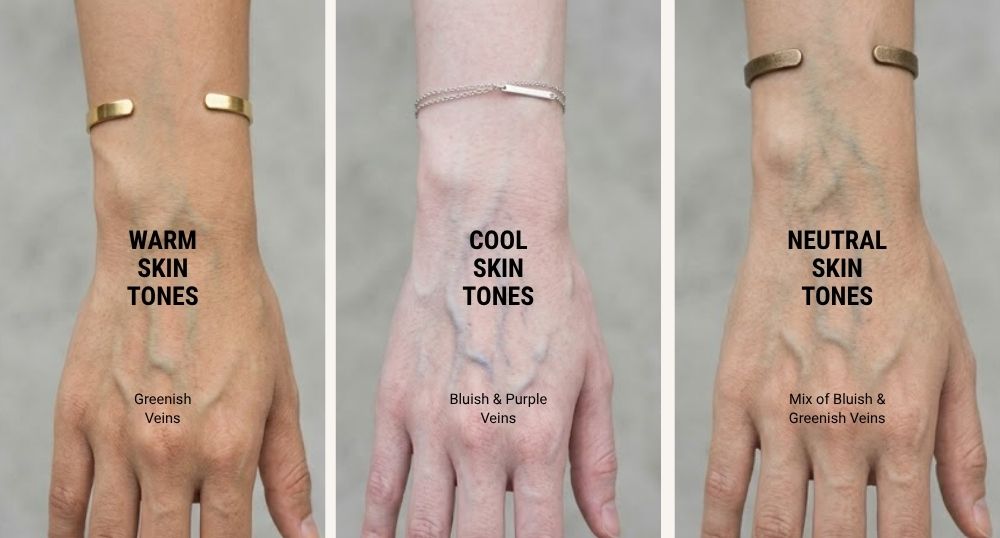
The first step in achieving a perfect color match is understanding your skin tone. Skin tones typically fall into three categories:

  • Warm undertones: Yellow, golden, or peachy hues
  • Cool undertones: Pink, red, or blue hues
  • Neutral undertones: A balanced mix of warm and cool

A simple way to check your undertone is by examining the veins on your wrist under natural light. Greenish veins usually indicate warm undertones, bluish veins suggest cool, and a mix signals neutral (Healthline).

Knowing your skin tone ensures that the hair color you choose enhances your natural beauty rather than clashing with your complexion.

Jewelry tip: Another quick test is to see which metal looks best on your skin. If gold jewelry flatters you more, your undertone is likely warm. If silver jewelry suits you better, your undertone is probably cool. If both look equally good, you likely have a neutral undertone.

***

2. Match Hair Shades to Skin Tone

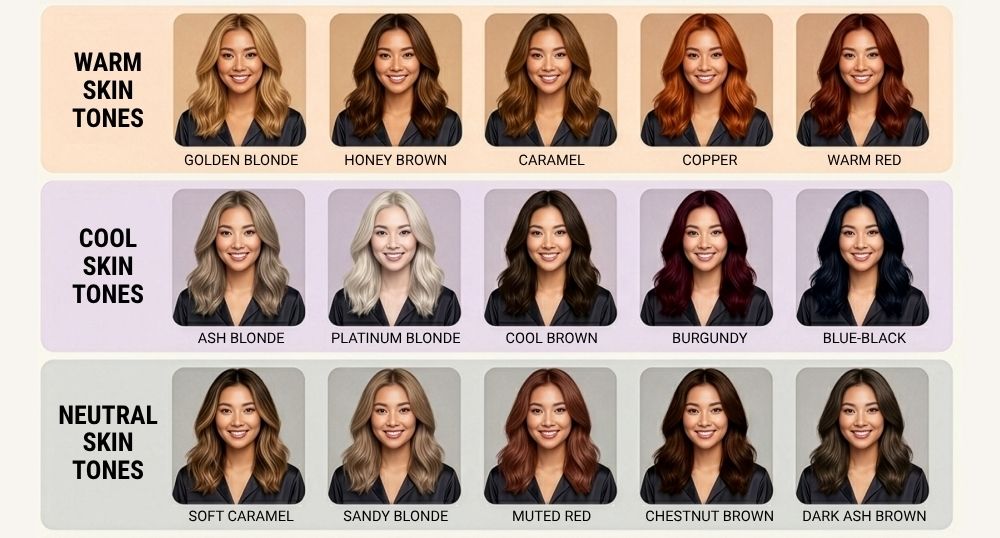
Once you know your skin tone, you can pick shades that naturally complement it. A proper color match ensures your hair enhances your features rather than overpowering them.

Hair Shade Skin Tone
  • Warm skin tones: Golden blonde, honey brown, caramel, copper, and warm reds. These shades bring out a healthy glow.
  • Cool skin tones: Ash blonde, platinum, cool brown, burgundy, and blue-black. Cool shades balance redness and brighten your complexion.
  • Neutral skin tones: Soft caramel, sandy blondes, and muted reds. Neutral undertones can carry both warm and cool shades.

Choosing hair shades close to your natural hair color is often the easiest way to maintain a natural color match and reduce maintenance.

3. Consider Contrast Levels

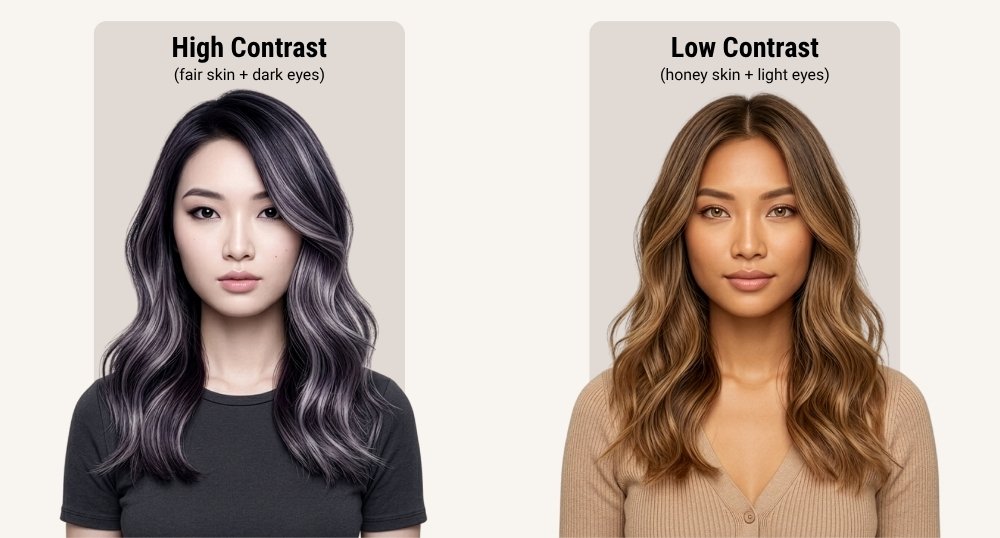
Contrast is the difference between your hair, skin, and eye color. It affects how bold or subtle your hair color should be to achieve the best color match.

  • High contrast (fair skin + dark eyes): Supports bolder, dramatic shades.
  • Low contrast (honey skin + light eyes): Looks best with softer, blended tones (Vogue).

Understanding contrast helps you choose a hair color that feels balanced and harmonious with your natural features.

4. Adjust Your Hair Shade for a Balanced Look

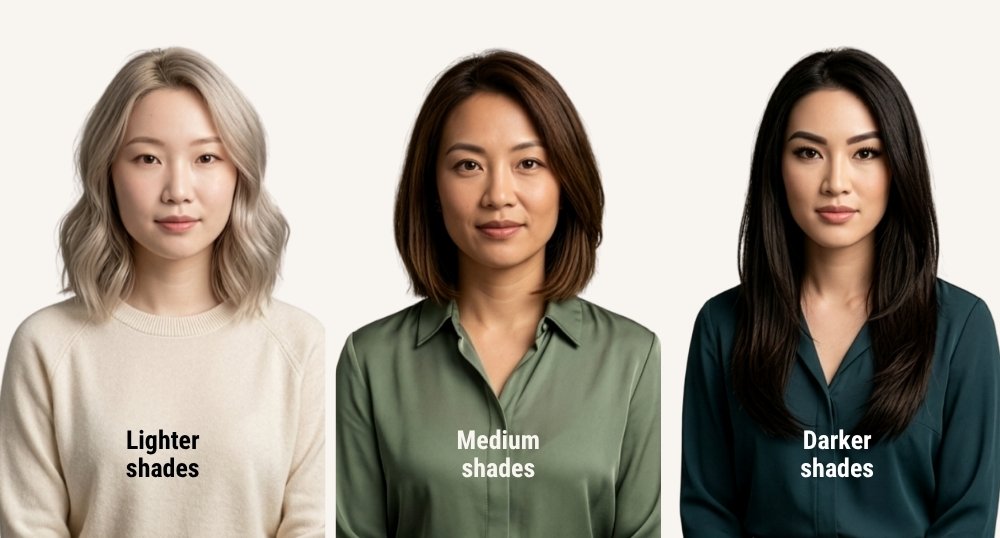
After evaluating skin tone and contrast, the next step is choosing a hair shade that balances your features. You don’t need to worry about complicated undertones, focus on how light or dark you want your hair relative to your skin.

Hair Shade for a Balanced Look
  • Lighter shades can brighten your face, especially for fair skin and low-contrast features.
  • Darker shades can add depth and dimension, particularly if your eyes or brows create higher contrast.
  • Medium shades often work well for neutral or balanced skin tones, giving a natural, flattering color match.

This step is about balance. Choosing a shade that complements your overall look while maintaining harmony with your skin and eyes.

5. Explore Custom Hair Color

Sometimes, standard shades may not perfectly suit your skin tone. A custom hair color allows you to blend shades that are tailored specifically for your complexion, eye color, and personal style. Even subtle highlights or lowlights can dramatically improve your color match.

6. Choose the Right Coloring Technique

How color is applied affects how it complements your skin tone. Two popular techniques are:

Balayage: Offers soft, natural highlights that blend seamlessly with your hair. Perfect for a subtle color match and low-maintenance styling.
Ombre: Creates a gradient from dark roots to lighter ends. Works best for high-contrast features and adds drama to your look.

Choosing the right technique enhances your color without overwhelming your natural features.
7. Maintain Your Color Match

Even the perfect hair color needs care to maintain its beauty:

  • Stick within 1–2 levels of your natural hair color for longevity.
  • Use professional hair products designed for color-treated hair.
  • Schedule touch-ups and treatments to preserve undertone balance and vibrancy.
  • Consider your eyes and overall contrast when refreshing highlights or color.

Achieving the perfect color match is both an art and a science. By understanding your skin tone, evaluating contrast, adjusting shades, and maintaining your color, you can create a look that enhances your natural beauty.

Ready to find your ideal hair color?

Book an appointment with our salon today and let our stylists create a look tailored just for you!

First Salon Visit: 7 Steps for New Customers to Feel Ready

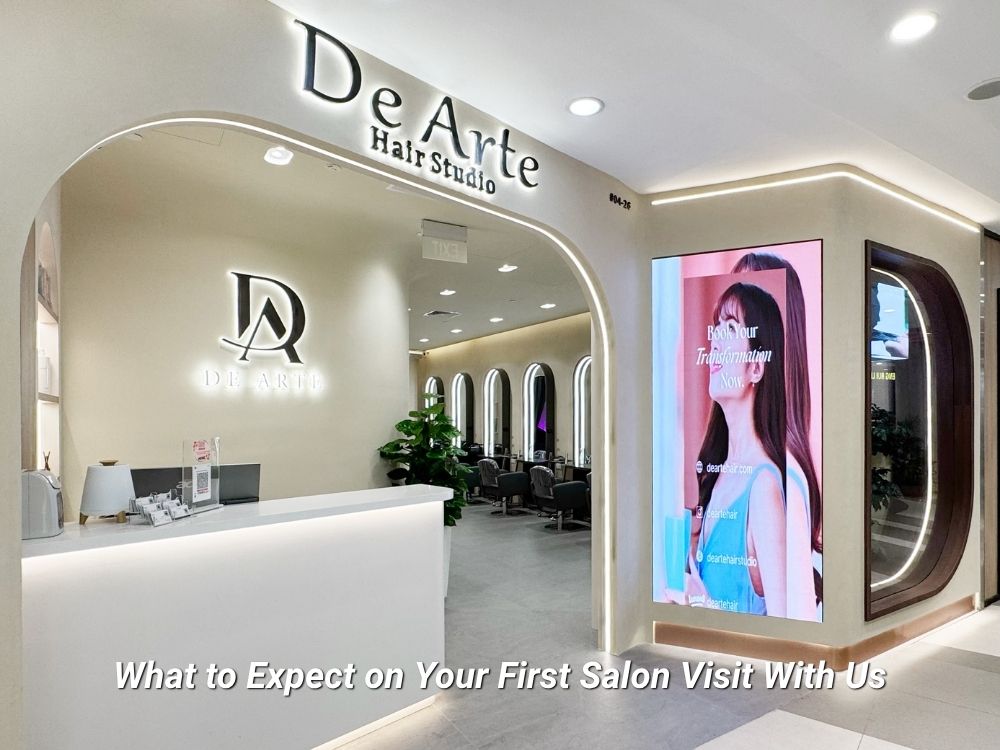
Your First Salon Visit with Us: What to Expect, Step-by-Step

Visiting a salon for the first time can feel a little overwhelming, but don’t worry. We’re here to make it easy and enjoyable. As a first-time customer, you might be wondering what to expect, and how the process will go. Whether you’re getting a haircut, color, or treatment, we’ve created this guide to walk you through each step of your first salon experience.

By the end, you’ll know exactly what to expect and how to communicate effectively with your stylist.

1. Arrival and Check-In: Getting Started
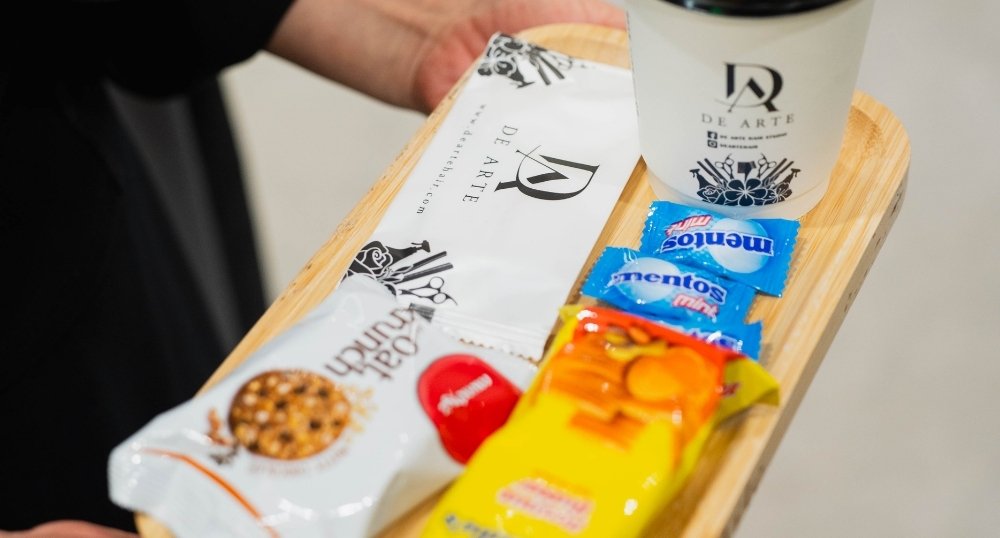
Your First Salon Visit De Arte Hair Drink Food

When you arrive at the salon, you’ll be greeted by our friendly staff (yes and we meant it!). Here’s what happens next:

  • Check-in: Confirm your appointment and any special requests.
  • Comfortable Atmosphere: You’ll be offered a drink (water or tea) to relax while you wait for your stylist.

Arrive 5–10 minutes early so you can relax before your service begins. If you’re running late, no worries, just let us know in advance so we can adjust the schedule and avoid affecting other customers’ appointments.

***

2. Your Personalized Consultation: Setting the Stage for Your Service
Your consultation is a critical part of your first salon visit. It’s your chance to discuss your hair goals with your stylist, and for them to guide you based on your hair type and face shape.

Here’s what to expect during the consultation:
  • Your Hair History: We’ll ask about any previous color treatments, cuts, or hair concerns you’ve had.
  • Your Goals: Whether you’re looking for a new cut, color, or treatment, your stylist will listen carefully and help you decide on the best option.
  • Your Preferences: We’ll ask about how much time you spend styling your hair and if you prefer a low-maintenance style or something more involved.

Bring reference photos of hairstyles you like, this helps your stylist clearly understand what you’re going for. After all, a picture is worth a thousand words isnt it!

***

3. How to Communicate With Your Stylist: Clear Communication is Key
Effective communication is essential, especially if this is your first visit with us. Here’s how to make sure your stylist understands exactly what you want:
Say What You LIKE and DISLIKE
Instead of vague descriptions, be specific. For example:
  • Instead of: “I want it short.”
  • Try: “I’d like it shoulder-length with layers, but still easy to manage.”
Ask Questions to Guide the Process
Feel free to ask your stylist questions like:
  • How often will I need touch-ups?
  • Will this style suit my face shape?
  • How long will this take?

The more specific you are about your preferences, the better we can tailor the service to match your vision. Don’t hesitate to ask questions if you’re unsure!

***

4. The Hair Wash: Relax and Unwind
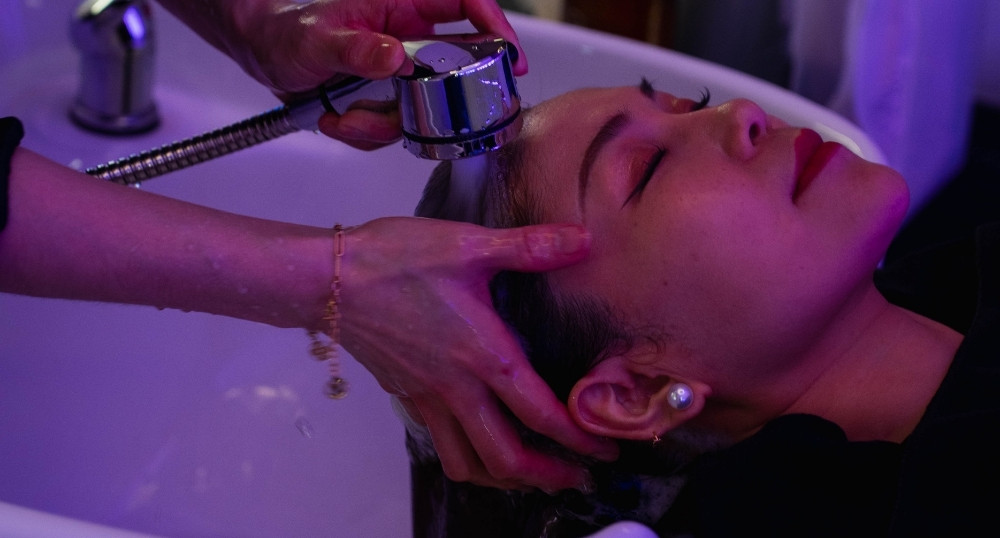
De Arte Hair Wash

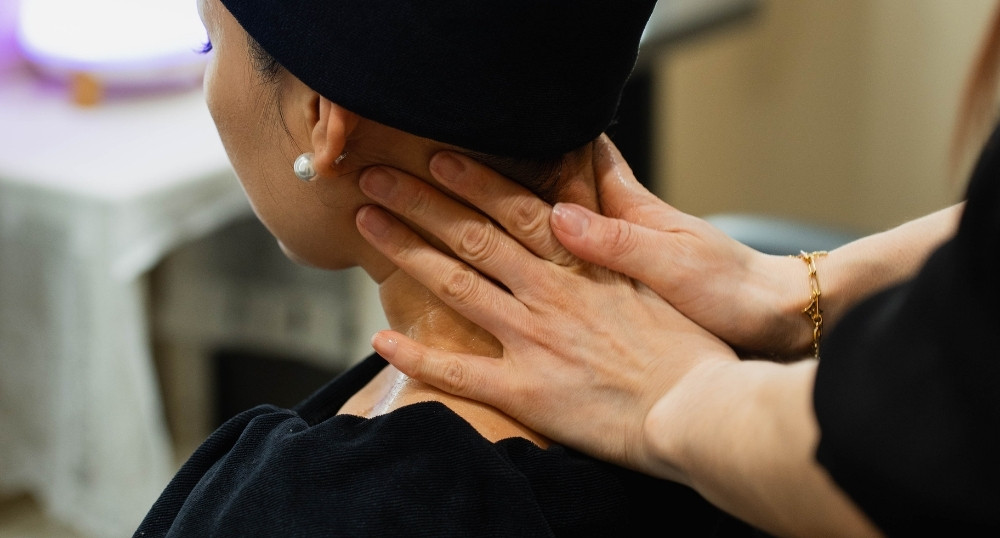
After the consultation, it’s time for the hair wash. This is a perfect moment to sit back and relax. Your stylist or technician will shampoo your hair and give your scalp a gentle massage. This helps relax you while ensuring your hair is clean and prepped for the next steps.

Note: Please be aware that a full hair wash may not be included with all services. For example, a fringe trim does not include a wash, so that step might be skipped. If you were expecting a wash as part of your service, we recommend confirming with your stylist beforehand to make sure it’s included.

If you’re ever uncomfortable, like the water temperature is too hot or cold, just let us know!

***

5. Cutting, Coloring, or Treatments: Your Style Comes to Life

Depending on the service you’re getting, each procedure may vary slightly. However, here’s what you can expect:

  • Wash & Blow-Dry: All haircuts (except fringe trims) include a complimentary wash and blow-dry. So, not only will you get a fresh cut, but you’ll also leave with your hair clean and styled.
  • Scalp Treatment & Head & Shoulder Massage: For any scalp treatment, a head and shoulder massage is included, except for the Free Radical Spa treatment.
  • Blow-Drying and Styling Services: After your wash or treatment, your stylist will blow-dry and style your hair based on your preferences, whether sleek, textured, or voluminous.

If you’re unsure about what’s included in your service, feel free to ask your stylist! They’ll be happy to walk you through each step. We’re committed to clearly communicating all services so both you and your stylist are aligned from the start. Learn more about our services by clicking here.

***

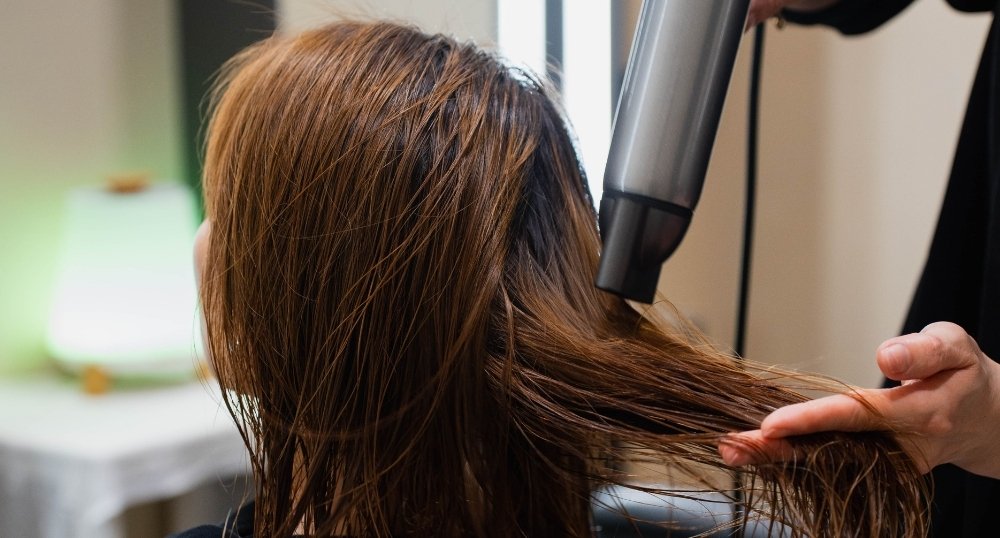
6. Rinsing and Styling: The Finishing Touches
De Arte Hair Drying

Once your hair is cut, colored, or treated, it’s time to rinse and style:

  • Rinsing: Your stylist will rinse out any color or treatment products.
  • Blow-Drying and Styling: After your hair is washed, your stylist will blow-dry and style your hair according to the look you discussed.
Want to recreate your salon look at home? Ask your stylist which products they used! Or shop them here if you remember!

***

7. Final Look and Aftercare Advice
Miyaki Professional Leave in Conditioner After Care Hair Care

Once your style is complete, your stylist will show you the final result. This is your time to ask for adjustments if necessary. You’ll also receive aftercare advice to help maintain your look:

  • How to style your hair at home
  • Recommendations for products that suit your hair type
  • Scheduling follow-up appointments for trims or touch-ups
Don’t be afraid to ask any lingering questions about maintaining your style or hair care!

***

Why Your First Salon Visit Matters to us

Your first visit isn’t just an appointment, it’s the beginning of a journey with your stylist and a step toward healthy, beautiful hair for years to come. A truly meaningful first visit is about more than leaving with a stunning look; it’s about:

  • Building trust – So your stylist understands your needs and can bring your hair vision to life.
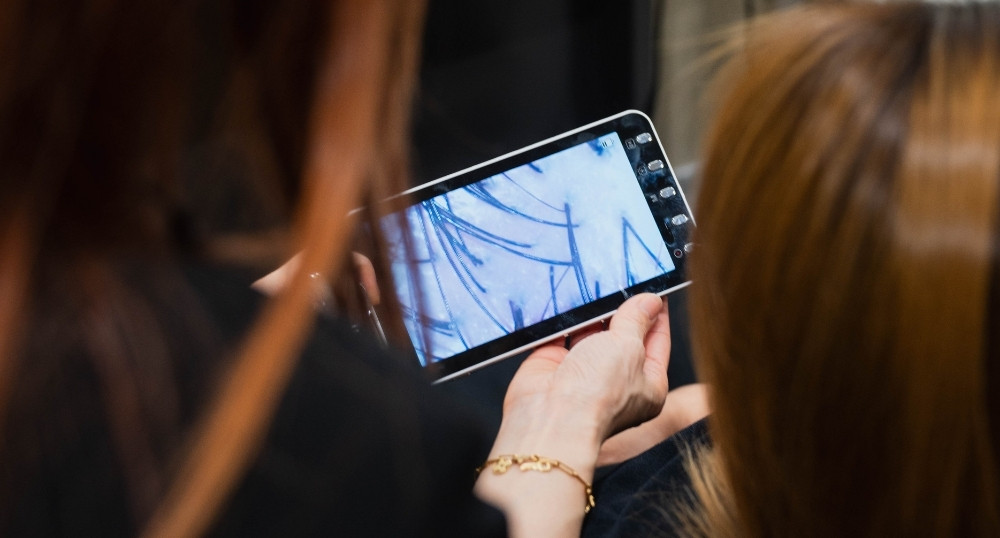
  • Caring for your hair’s future – addressing your unique concerns and laying the groundwork for long-term hair health.
  • Boosting your confidence – leaving the salon feeling empowered, radiant, and truly happy with your hair.

Your first visit is the start of something beautiful, and we’re here to make it special.

Ready to Book Your First Salon Appointment?

We’re excited to welcome you to the salon! Your first visit with us is just the beginning of a great relationship, and we’re here to make sure you have the best experience possible.

Book Your First Appointment Today
  • Personalized consultation
  • Relaxing, professional atmosphere
  • Expert stylists who care about your needs

We look forward to seeing you!

First Timer FAQ

Should I wash my hair before my appointment?

If you’re getting a haircut, clean hair is usually preferred. For color, it’s often better to leave your hair slightly unwashed to protect the scalp.

How long will my appointment take?

Service duration varies depending on what you’re having done. A haircut typically takes 30–60 minutes, while colouring or treatments may require more time, especially if processing is involved. For a more accurate estimation, we recommend checking with the stylist in person.

What if I don’t like my hair after the appointment?

We want you to love your hair, and we sincerely meant it. If something doesn’t feel right, please let us know and we’re happy to make adjustments. Clear communication helps prevent misunderstandings, and you can find more details in our 5-day satisfaction policy.

Can I use my phone during the appointment?

Of course! Feel free to bring your phone or read a magazine, but just be mindful that your stylist may need your full attention during the consultation and cutting process.

Do I need to make an appointment, or do you accept walk-ins?

Appointments are preferred to ensure availability, but we do welcome walk-ins whenever possible. You can book your appointment here or call your preferred salon location directly.

Why can’t I book an appointment online?

Online bookings must be made at least 24 hours in advance of your desired appointment time. If your preferred slot is within the next 24 hours, please contact the outlet directly for a quicker check on availability and assistance with your booking.

What payment methods do you accept?

We accept credit and debit cards, cash, PayNow, GrabPay, and NETS.

Please note that Atome and GrabPay Later are available for all hair service packages only. For more information, please refer to our payment policy.

Do you upsell services or products?

We understand that first-time visits can feel overwhelming. Your comfort is our top priority. While your stylist may suggest services or products that could benefit your hair, you are always free to say no. There’s no pressure, and you can stop or decline any recommendation at any time.

Can’t find your question here? For more FAQs and information, please click here.

Best Shampoos for Hair Loss & Oily Scalp in Singapore

Best Shampoos for Hair Loss & Oily Scalp in Singapore

Hair loss and oily scalp are super common here in Singapore. Not only is oily scalp a common factor in hair loss, but I personally struggle with it, so I wanted to see how different shampoos actually feel, smell, and work in real life (or at least for me).

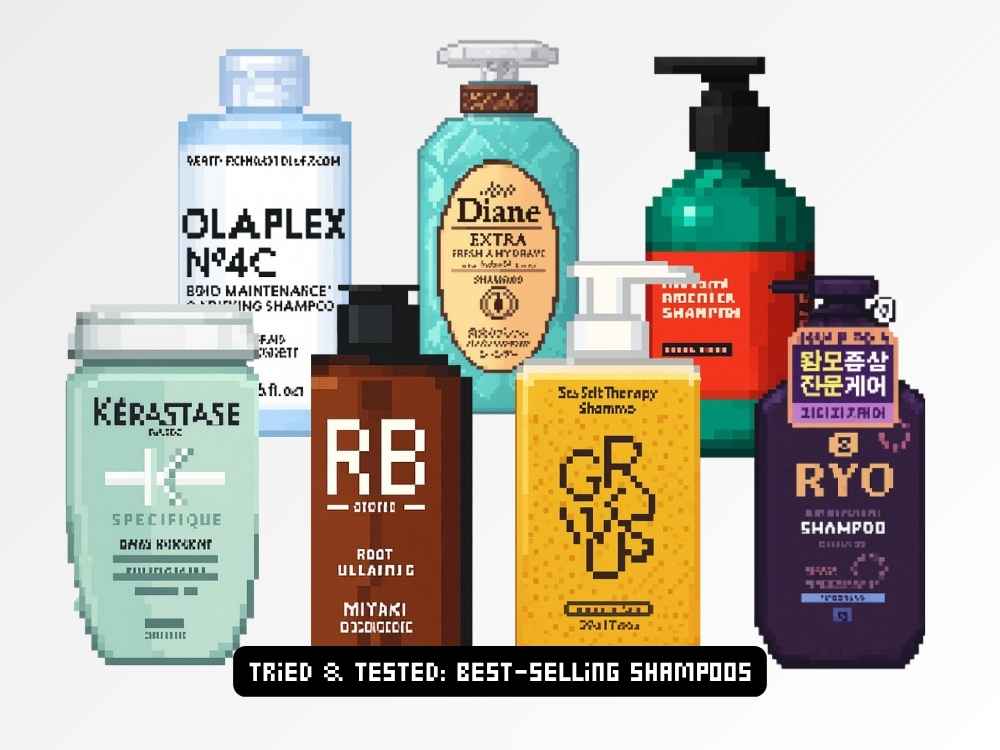
To do that, I bought and tried some of the top‑selling and most talked‑about shampoos on Shopee Singapore, and also included products that show up in 2026 “best shampoo” recommendations online (based on search trends, user reviews, and aggregator lists). I also wanted to understand the formulas and the hype, so I can see how our own salon-grade formula measures up in real life. Not to criticise, but just trying them, reviewing them, and sharing my experience and then you can read it and decide for yourself.
The Shampoos I Tried

Once again, this simply is a research and trial of popular shampoos available in the market. The goal was to understand how these products feel, smell, and perform for oily scalp concerns, so reader like yourself can make an informed choice. #NotSponsored; Just My Honest Take
Product

Focus

Approx. Price (SGD)
Where to buy

Olaplex No.4C Clarifying Shampoo

Clarifying Shampoo

~$52

Sephora

Miyaki Professional Root Balancing

Oily scalp

~$40

Shop new

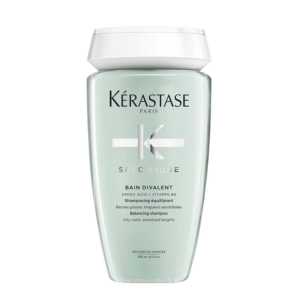
Kérastase Bain Divalent

Oily roots

~$38.30

Shopee

Growus Sea Salt

Scalp detox

~$19.26

Shopee

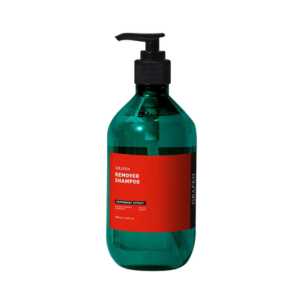
[GRAFEN] Minty Remover Shampoo 500ml

Oily scalp

~$18.90

Shopee

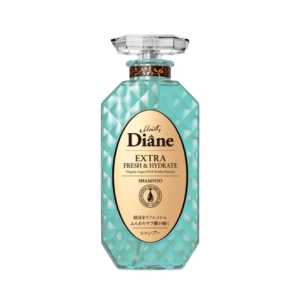
Moist Diane Fresh & Hydrate

Hair fall

~$15.22

Shopee

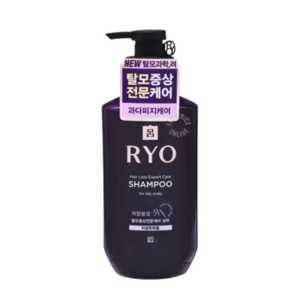
Ryo Hair Loss Expert

Root stimulation

~$12.30

Fairprice NTUC

*The prices listed are approximate at the time of purchase. Discounts, promotions, or campaigns may affect the final price depending on when you view the product listing. Links are for reference only and may not be available or updated at the time of viewing, as these products links are not reviewed continuously.
How I Test
  • I tried each shampoo for about 2 weeks, which is enough to get a sense of feel, smell, and any side effects but probably too short to judge long-term hair growth.
  • Switching shampoos frequently can sometimes give different results or even contradict observations, so this is mainly about immediate impressions.
  • My main focus was on oily scalp concerns, since that’s both common here in Singapore and something I personally deal with.
Two weeks is enough to see how a shampoo behaves, but longer-term consistency is what really counts.
What Makes a Shampoo Feel Good for Oily Scalp
From my experience, a shampoo that works well for oily scalp should:
  • Clean without over-stripping → hair shouldn’t feel dry or crunchy
  • Smell pleasant → fresh but not overpowering
  • Soothe the scalp → no itching, burning, or irritation
  • Support scalp balance over time → oils regulated without buildup
Observations From Testing
Olaplex No.4C Clarifying Shampoo

Deep cleanse and detox; excellent for removing buildup and excess oils weekly, though not meant for daily washes because of its strength.

Miyaki Professional Root Balancing

Targets oily scalp, soothes and refreshes, and provides a consistent, gentle feel suitable for daily use. Used in our salon, it has received positive feedback from customers for both its texture and pleasant fragrance.

Kérastase Bain Divalent

Premium salon‑grade product that balances oily roots and nourishes hair lengths. Great for regular use with strong market reputation.

Growus Sea Salt

Sea salt base gives a detoxing sensation, feels like it removes buildup. Can be drying if used every day.

[GRAFEN] Minty Remover Shampoo

I love the minty scent, it feels really refreshing and gives a cool, clean sensation after every wash.

Moist Diane Fresh & Hydrate

Soft, smells great, nourishes hair shafts; less about scalp balance. Nourishes hair more than deep oil removal.

Ryo Hair Loss Expert

Herbal, stimulates roots, but scalp oil wasn’t fully balanced.

Key Ingredients Of Miyaki Professional Root Balancing Shampoo & Why They Matter

Discussing the details of other sellers’ products can be tricky, as inaccurate or misleading information could cause controversy. For this reason, I’ll focus on highlighting our product’s key selling points instead.

  • Menthol + Malic Acid → refreshing, balances oil
  • Eribotrya Japonica Leaf & Swertia Japonica Extracts → calm irritation, strengthen roots
  • Sophora Angustifolia Root & Ginkgo Biloba Leaf Extracts → improve circulation and scalp health
  • Carthamus Tinctorius (Safflower) Flower Extract → light nourishment without weighing hair down

Miyaki Professional Root Balancing Shampoo is formulated with carefully selected botanical extracts to address both scalp and hair needs. In short, it cleanses, refreshes, and soothes gently, making it perfect for daily use on oily scalps.

My Takeaways

Trying multiple shampoos gave me a clearer sense of how different products feel and perform for oily scalps in Singapore. Needless to say, the reason these shampoos are popular is that they effectively cleanse and refresh the scalp, which explains the hype.

At the same time, everyone’s hair and scalp are different, so experiences may vary depending on scalp type, usage habits, and the local climate.

Ultimately, what really matters is how a shampoo feels, smells, and interacts with your scalp. Sometimes that matters just as much as the ingredients or the buzz around a product.

” The real test comes from consistent use over time. “

There are so many shampoos on the market, and it can be really hard to find one that truly suits you, you’re literally spoiled for choice. Most of the time, we end up relying on reviews or word of mouth, but honestly, if you happen to come across this article, giving our Miyaki Root Balancing Shampoo a try won’t hurt. Who knows, it might just become your next favourite addition to your self-care routine.

And if oily scalp isn’t your main concern, you can also check out our article on the Miyaki Professional series, which covers the other products we offer. 🔗 Learn more: How to Identify Your Scalp Type & Choose the Right Shampoo

10 Haircare Myths You Should Stop Believing: Debunking the Most Common Misconceptions

Hair Myths Debunking-the-Most-Common-Misconceptions

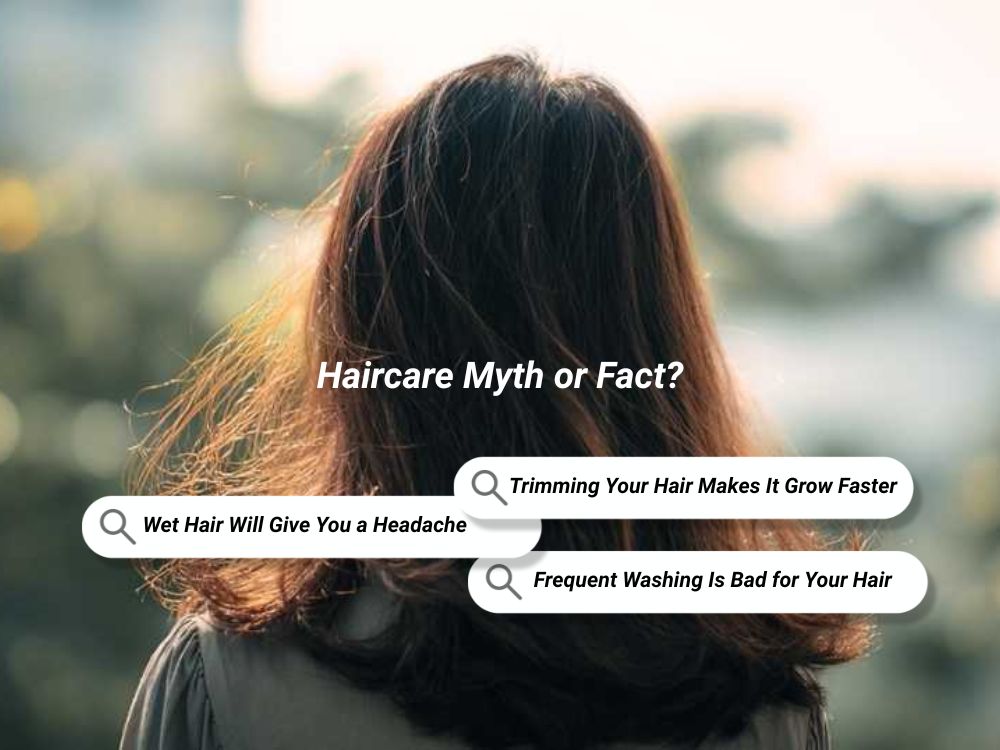
Myth or Fact?

When it comes to haircare, there are a lot of myths out there.  From “washing your hair less frequently” to “using keratin treatments for every type of frizz,” misconceptions can easily lead you down the wrong path. If you’ve ever been confused by some of these haircare myths, you’re definitely not alone. It’s time to set the record straight so you can make more informed choices for your hair.

Here are the top 10 haircare myths debunked, with some real facts to help you understand what really works when it comes to caring for your hair.

1. Frequent Washing Is Bad for Your Hair
Haircare Myths #01 Frequent Washing Is Bad for Your Hair
Many people believe that washing their hair too often can strip it of natural oils and lead to dryness. While this may hold true for some hair types, frequent washing isn’t universally harmful. In fact, some people, particularly those with oily hair or active lifestyles, may benefit from washing more often.
Fact: The frequency of washing should depend on your hair type and lifestyle. Oily hair may require daily washing to keep it fresh, while dry hair benefits from less frequent washes. According to the American Academy of Dermatology, the key is finding the right balance for your scalp; neither over-washing nor under-washing can maintain healthy hair (source: AAD).
2. Trimming Your Hair Makes It Grow Faster
Trimming Hair
One common misconception is that regular trims can make hair grow faster. While trimming removes split ends and helps keep hair looking healthy, it doesn’t actually impact hair growth.
Fact: Hair growth starts at the scalp, not the ends. The average growth rate is around half an inch per month, and trimming helps prevent breakage, which can make your hair appear longer and healthier.

You may be interested in: 🔗 The Science of Hair Growth and Why You Should Care
3. Keratin Treatments Are Always the Best Solution for Frizzy Hair
Haircare Myths #03 Keratin Treatments Are Always the Best Solution for Frizzy Hair
While keratin treatments are marketed as the ultimate frizz fix, they’re not the best solution for every hair type. For some hair types, particularly fine or damaged hair, keratin can lead to more harm than good.
Fact: Keratin treatments help smooth and straighten hair, but they’re not universally ideal. Depending on your hair’s condition, certain treatments may be more effective at controlling frizz than others. One of our most popular anti-frizz options is the Argan Oil Texture Control treatment. Regardless, we always recommend consulting a professional before deciding on the best treatment for your hair.
4. Wet Hair Will Give You a Headache or Make You Sick
You’ve probably heard that sleeping with wet hair can make you sick or give you a headache, but this is actually a myth.
Fact: Wet hair itself doesn’t cause illness or a cold. Colds are caused by viruses, not by being out in the cold with wet hair (source: MedicalNewsToday). However, when your hair is wet, it may make you feel more chilled, especially in cooler or air-conditioned environments, which could contribute to discomfort or even a headache. But this is simply because your body is losing heat faster, not because your hair is wet.
That said, going to bed with wet hair or leaving it damp for long periods can increase the risk of scalp infections. The moisture from your hair can dampen your pillow, creating a warm, humid environment where fungi and yeast thrive. This can lead to scalp conditions such as dandruff, or even fungal infections like seborrheic dermatitis.

**Tip**
To avoid potential scalp issues, it’s a good idea to dry your hair as much as possible before going to bed or stepping out. You don’t need to fully dry it, but make sure it’s not soaking wet.

5. Hair Color Always Ruins Your Hair
Haircare Myths #05 Hair Color Always Ruins Your Hair
Many people assume that coloring your hair leads to irreversible damage, but modern hair dyes and techniques have evolved significantly. When applied and cared for properly, hair color doesn’t necessarily harm your hair.
Fact: Hair coloring doesn’t inherently damage hair. If done properly and followed with good aftercare, such as using nourishing shampoos and conditioners, hair color can remain vibrant without causing long-term harm. However, excessive coloring or poor aftercare can lead to dryness or breakage.
6. Heat Styling Will Always Destroy Your Hair
Haircare Myths #06 Heat Styling Will Always Destroy Your Hair

Heat styling tools like straighteners and curling irons often get a bad rap, but they don’t automatically destroy your hair.

Fact: Heat damage happens when you overuse heat styling tools, but using them in moderation with heat protectant products can minimize damage. Opting for lower heat settings and taking breaks between styling sessions will help keep your hair healthy. Remember, moderation is key, and occasional heat styling doesn’t have to ruin your hair if you use the right precautions.
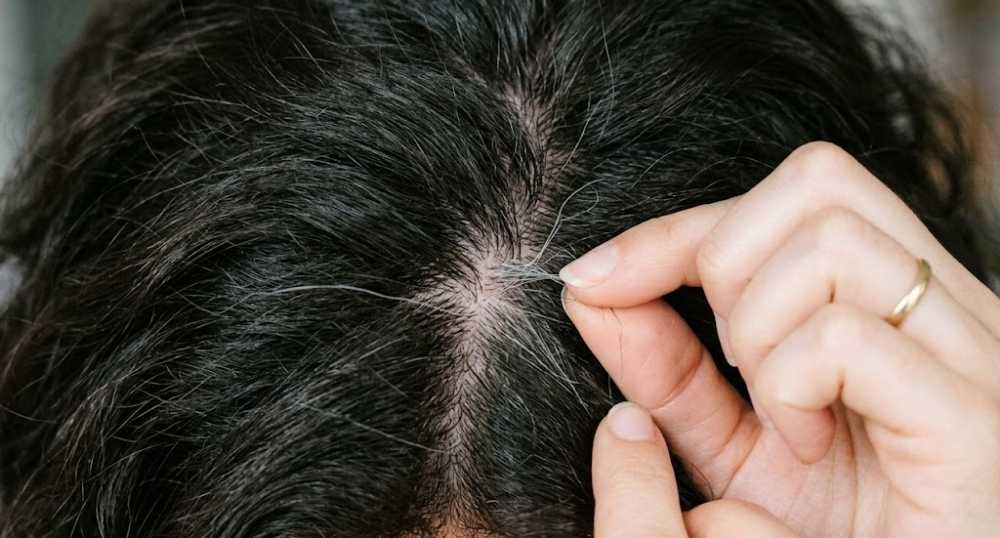
7. Pulling Out a Grey Hair Will Cause More to Grow Back
Haircare Myths #07. Pulling Out a Grey Hair Will Cause More to Grow Back
Many people believe that if you pull out a grey hair, more will grow back in its place. This is a common misconception, but it’s simply not true.
Fact: Pulling out a grey hair doesn’t cause more to grow back. Your hair follicles are responsible for hair production, and when you pull a hair out, the follicle remains unaffected. That grey hair won’t “multiply” after being removed. However, pulling out hairs regularly can damage the follicle and lead to hair thinning or scarring, which could affect the regrowth of that hair.
Grey hair occurs because the melanocytes (cells responsible for pigment) in your hair follicles stop producing melanin as you age. Genetics plays the main role in when your hair turns grey, not the act of pulling it out.

Learn more about 🔗 Pulled a Grey Hair? Here’s What Really Happens Next!

8. Hair Needs to "Breathe"
Many people avoid washing their hair too often because they believe their hair needs to “breathe.” However, your hair doesn’t need to be exposed to air to remain healthy.
Fact: Hair follicles are beneath the scalp’s surface and don’t require “breathing.” What matters most is keeping your scalp clean and healthy to promote strong hair growth.
9. Split Ends Can Be Repaired with Products
Haircare Myths #09 Split Ends Can Be Repaired with Products
A common belief is that split ends can be “repaired” with hair products. While there are many products that claim to mend split ends, the truth is that once hair is split, it cannot be truly repaired until it’s trimmed.
Fact: Split ends occur when the protective outer layer of the hair shaft is damaged, causing the hair to break apart. While products like serums and conditioners can temporarily smooth the ends, the only true fix is to trim the hair. Shampoos formulated for damaged hair can help nourish and strengthen your hair, reducing the likelihood of further splits and preventing additional damage. However, these products can’t permanently repair already split or “dead” hair.
10. You Should Regularly Switch Your Shampoo for Better Results
Many people believe that switching shampoos frequently will prevent hair from getting used to a product and improve its results. However, this idea is 50/50 true.
Fact: While there is no scientific proof that your hair becomes “immune” to a shampoo, there is some truth to the idea that certain shampoos may become less effective over time for specific scalp types.

For example, if you use an oil-control shampoo for an extended period on an oily scalp, your scalp may eventually adapt, and the shampoo may become less effective at controlling oil. This happens because your scalp can get used to the ingredients in the shampoo, and it might no longer produce oil in the same way, requiring a change to another shampoo with a different formulation to achieve the desired results.
Consistency is key, but if your shampoo is no longer giving you the results you need, it’s okay to switch it up. Make sure to choose one suited to your changing scalp or hair condition. For example, if your oily scalp isn’t responding to oil-control shampoo anymore, you might want to try one that’s more hydrating or has a different active ingredient.

To make sure you’re using the right shampoo for your specific hair and scalp type, it’s always best to consult a professional. Alternatively, you can check out our article on 🔗 How to Identify Your Scalp Type & Choose the Right Shampoo to learn how to properly nourish and protect your hair with the right selection.
Debunk the Myths, Embrace Healthier Haircare

Now that you know the truth behind these common haircare myths, you’re ready to make smarter choices for your hair. Forget the myths, and focus on what works best for your unique hair type and needs.

And if you’re still unsure what to do with your hair, why not consult a professional? Whether it’s a salon visit, a phone call, a social media DM, or WhatsApp, we’re here to help! (For faster replies, reach out during working hours 😅)

Mild to Severe: 7 Levels of Chemical Hair Damage

7 Levels of Chemical Hair Damage

Struggling with chemical hair damage?

Whether from bleaching, coloring, perming, or relaxing, chemical treatments can weaken your hair over time (often more than you realize).

This article breaks down the 7 levels of chemical hair damage, from early dryness to severe breakage, and shows you exactly how to treat each stage. If you catch the signs early, you can restore strength, shine, and manageability before it’s too late.

What Is Chemical Hair Damage?

Chemical hair damage happens when treatments like bleach, dye, relaxers, or perms alter your hair’s internal structure. These processes:

  • Open or lift the cuticle (outer layer)
  • Break down keratin proteins
  • Disrupt natural moisture balance

The result? Hair becomes drier, weaker, more porous, and prone to breakage.

🔗 If your damage is specifically from bleaching, read: 7 Methods to Support Recovery for Bleached Hair
🔗 Want to understand the science? See: Hair Structure Explained: Cuticle, Cortex, and Healthy Hair Tips

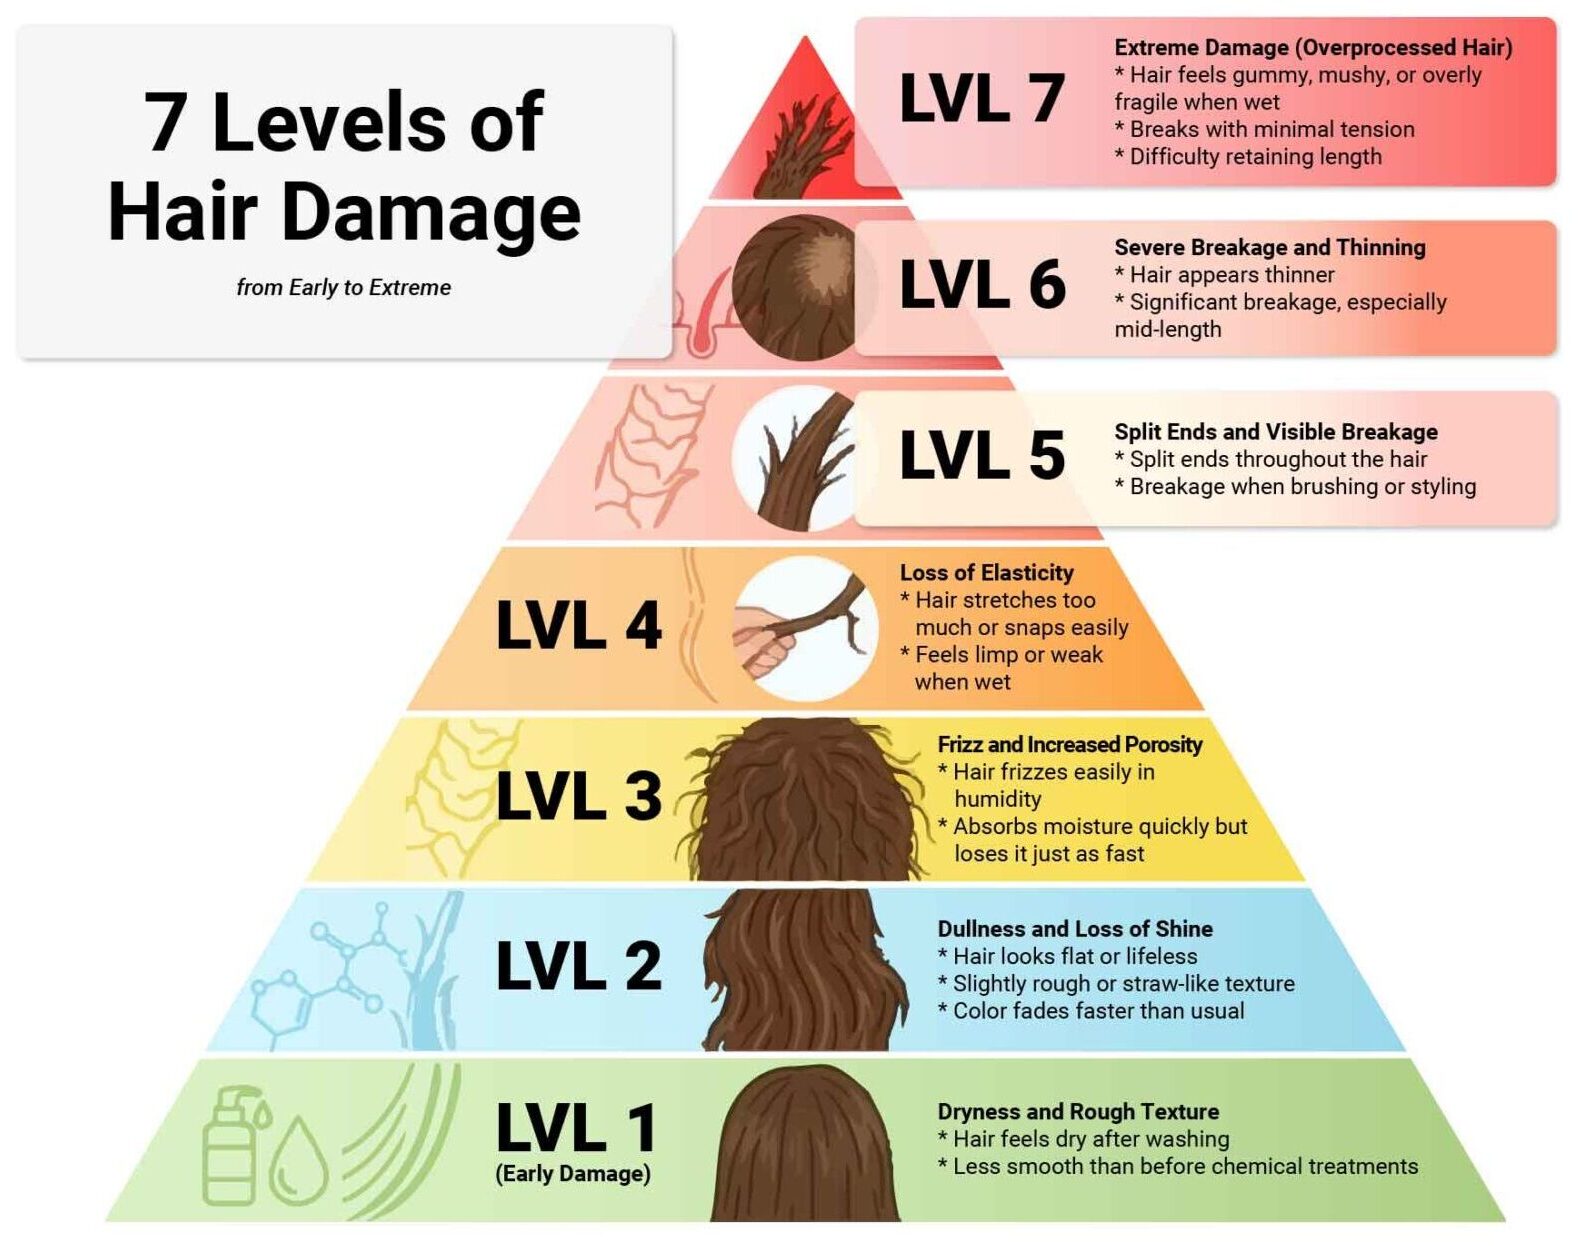
The 7 Levels of Chemical Hair Damage

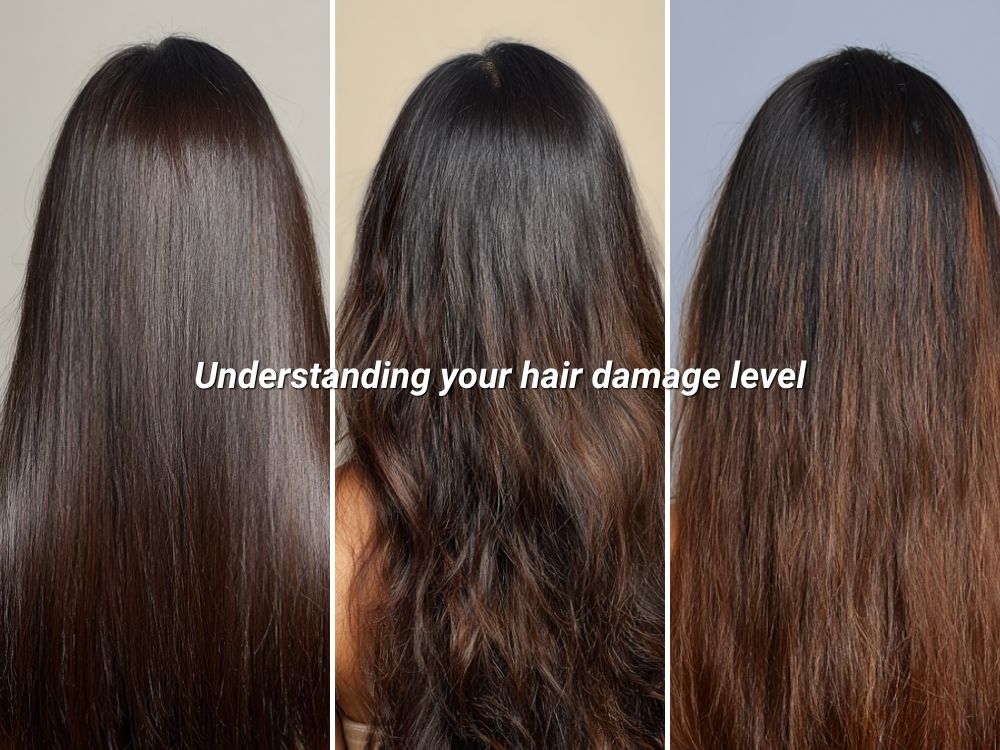
Understanding your damage level helps you choose the right treatment, not just more products.

7 Levels of Chemical Hair Damage
Level 1: Dryness and Rough Texture (Early Damage)

At the earliest stage of chemical hair damage, hair typically begins to feel dry after washing and loses its natural smoothness. You may notice it feels slightly rough compared to before any chemical treatments. This happens because the hair cuticle becomes slightly lifted, allowing moisture to escape more easily and making it harder for hair to stay hydrated.

At this stage, recovery is relatively simple. Deep-conditioning masks used once or twice a week can help restore moisture, while switching to a gentle, sulfate-free shampoo prevents further drying. Adding a leave-in conditioner also supports daily hydration and improves softness.

🔗 If your damage is specifically from bleaching, read: 7 Methods to Support Recovery for Bleached Hair
🔗 Want to understand the science? See: Hair Structure Explained: Cuticle, Cortex, and Healthy Hair Tips

Level 2: Dullness and Loss of Shine

As damage progresses, hair may start to look dull, flat, and lifeless, often with a slightly rough or straw-like texture. You might also notice that color fades faster than usual, especially in chemically treated hair.

This occurs because the cuticle surface becomes uneven, preventing light from reflecting properly, which reduces shine. To improve this, gloss treatments or shine-enhancing products can help smooth the hair surface. It’s also important to reduce heat styling, as excessive heat worsens cuticle damage. Using lightweight oils or serums can help restore a smoother, shinier appearance.

Level 3: Frizz and Increased Porosity

At this level, hair becomes more difficult to manage, often frizzing easily in humidity. You may also notice that it absorbs moisture quickly but loses it just as fast, which is a key sign of increased porosity.

This happens because the cuticle is more open and uneven, making it harder for the hair to retain moisture. Managing this stage requires both hydration and protection. Using anti-frizz serums or sealing oils helps smooth the cuticle, while layering moisture (leave-in, cream, then oil) helps lock hydration into the hair. It’s also helpful to avoid over-washing, which can strip moisture further.

Level 4: Loss of Elasticity

When chemical damage begins to affect the inner structure of the hair, elasticity is reduced. Healthy hair should stretch slightly and return to its original shape, but damaged hair may stretch too much or snap easily, especially when wet. It may also feel limp or weak.

This occurs because keratin bonds inside the hair shaft are weakened or broken during chemical treatments. To repair this, protein treatments and bond-repair products are essential to reinforce the hair’s structure. It’s equally important to minimize brushing when hair is wet and to avoid further chemical processing during recovery.

Level 5: Split Ends and Visible Breakage

At this stage, damage becomes clearly visible. You may see split ends throughout the hair and experience breakage during brushing or styling. This indicates that the hair structure is compromised along the shaft, not just at the ends.

Regular maintenance becomes critical here. Trimming every 6–8 weeks helps prevent splits from worsening, while strengthening treatments support weakened strands. Avoiding heat tools is also important to prevent additional stress on already fragile hair.

Level 6: Severe Breakage and Thinning

As damage worsens, hair may begin to look noticeably thinner, especially through the mid-lengths, due to ongoing breakage. The hair fibers are now severely weakened and losing structural integrity.

At this level, recovery requires a more targeted approach. Bond-repair treatments can help rebuild internal strength, while protective styles reduce daily stress on the hair. Seeking professional guidance is strongly recommended to create a treatment plan that prevents further damage and supports recovery.

Level 7: Extreme Damage (Overprocessed Hair)

In the most severe stage, often caused by repeated bleaching or overlapping treatments, the hair’s internal structure is heavily compromised. Hair may feel gummy, overly soft, or extremely fragile when wet, and can break with very little tension. It may also struggle to retain length due to constant breakage.

Immediate action is necessary. All chemical treatments should be stopped to prevent further damage. Recovery requires a careful balance of protein and moisture treatments, as too much of either can worsen the condition. At this stage, professional intervention is essential, as advanced treatments or restructuring may be needed to restore strength and manageability.

What Causes Chemical Hair Damage?

The most common triggers include:

  • Bleaching: Breaks down melanin and weakens keratin
  • Hair coloring: Opens the cuticle repeatedly
  • Perms & relaxers: Break and reshape hair bonds
  • Heat styling: Further damages already weakened hair

Over time, repeated exposure leads to cumulative damage, pushing hair from mild dryness to severe breakage.

How to Repair Chemical Hair Damage (At Any Level)

No matter your damage level, these principles apply:

1. Restore Moisture: Hydration is the foundation of recovery. Use deep conditioners and leave-ins consistently.

2. Rebuild Protein: Protein treatments help reinforce weakened hair structure but balance is key.

3. Repair Bonds: Bond-repair treatments target internal damage caused by chemicals.

4. Reduce Stress: Limit heat styling, tight hairstyles, and further chemical treatments.

5. Trim Strategically: Removing damaged ends prevents further splitting and breakage.

When to Seek Professional Help

If your hair is at Level 5 or above, at-home care may not be enough. A professional can:

  • Assess your damage level accurately
  • Recommend targeted treatments
  • Prevent further hair loss or breakage
Start Your Hair Recovery Journey Today

Chemical hair damage doesn’t happen overnight and neither does repair. But with the right approach, you can restore strength, shine, and resilience over time.

Ready to repair your hair properly?

Book a professional consultation today and get a personalized recovery plan for your hair type.

Transform Your Look with Our Top 8 Salon Favourite Balayage – Creative Hair Coloring Experts

Explore our salon favourite balayage style, one of the most requested creative hair coloring styles for customers seeking a look that’s effortless, modern, and completely personalized. If you’ve been hesitating to try balayage, now is the perfect moment to transform your hair with a style that grows out naturally, shines beautifully, and perfectly complements your personality.

Why Choose Us for Hair Coloring?

At De Arte Hair Studio, we create custom, stunning balayage designs that leave every customer feeling confident. Here’s why customers keep coming back:

  • Expert Stylists: Specialized in balayage, highlights, and creative hair coloring for flawless results.
  • Tailored Color: Each balayage is customized for your skin tone, hair type, and lifestyle.
  • Premium Products: Only salon-grade, hair-friendly dyes are used for long-lasting vibrancy.
  • Stress-Free Experience: From consultation to finishing touches, we make your transformation effortless.

Balayage is a low-maintenance, timeless solution that grows out naturally while keeping your hair looking gorgeous between salon visits.

Still hesistating whether to get Balayage?

If you’ve been unsure about getting balayage, here’s why now is the perfect time:

  1. Effortless Beauty: Balayage highlights grow out naturally, so you avoid harsh regrowth lines.
  2. Customizable Style: From subtle sun-kissed tones to bold, creative hair coloring, your look is entirely unique.
  3. Confidence Boost: A fresh balayage adds depth, dimension, and shine, instantly elevating your style.

Still undecided? Learn the difference between balayage and ombre in our guide: Ombre vs Balayage. If balayage isn’t your style, ombre might be the one for you.

Top 8 Salon Favourite Balayage Hair Color Examples

Discover our salon favourite balayage styles that customers return for again and again. These timeless, hand-painted looks combine artistry and precision to give your hair depth and dimension:

1. Honey Blonde Balayage

A timeless salon favourite, honey blonde balayage adds warmth and brightness without looking overdone.
Best for: Brunettes wanting a soft glow-up.
Why customers love it: Low maintenance, natural grow-out, perfect year-round.

2. Caramel Swirl Balayage

Rich caramel ribbons blended into dark brown hair create depth and dimension.
Best for: Medium to dark brown hair.
Creative edge: Adds shine and movement while keeping it classy.

3. Ash Blonde Melt

A cool-toned balayage that transitions from natural roots into smoky ash ends.
Best for: Customers who prefer modern, cool-toned creative hair coloring.
Trend factor: One of the most requested looks in contemporary salons.

4. Chocolate Mocha Balayage

Deep chocolate tones blended with mocha highlights for a glossy, luxurious finish.
Best for: Customers wanting subtle yet noticeable creative hair coloring.
Salon tip: Ideal for professional settings while still being stylish.

5. Copper Flame Balayage

Bold copper and auburn shades hand-painted for a fiery, dimensional look.
Best for: Customers wanting vibrant, statement-making hair.
Creative factor: Perfect for adding warmth and brightness all year round.

6. Rose Gold Balayage

Soft pink tones blended into blonde or light brown hair for a romantic finish.
Best for: Customers who love playful, Instagram-worthy styles.
Why it’s trending: A top creative hair coloring choice for younger customers.

7. Mushroom Brown Balayage
A cool-toned blend of soft brown, ash grey, and subtle blonde hues inspired by earthy mushroom shades. This balayage creates a smoky, dimensional finish with a natural yet modern vibe.

Best for: Customers who love cool, muted tones without going too light.
Why customers love it:
Low-maintenance, sophisticated, and effortlessly on-trend.

8. Bronde (Brown + Blonde) Balayage

The perfect in-between shade that combines brunette depth with blonde brightness.
Best for: Customers who can’t choose between blonde or brown.
Salon favourite factor: Universally flattering and low maintenance.

Every style is designed to stay trendy yet timeless, making sure your hair is not just stylish today, but your favourite look for years to come.

Book Your Salon Favourite Transformation Today

Ready to try our creative hair coloring techniques? Don’t wait! Book your appointment now and be the best balayage style in town 😏

✨ Secure your slot with our expert stylists today.